Chapter 5. Multiview Apps
- 5.0 Preview
- 5.1 New Project
- 5.2 View Controller and Nib Files
- 5.3 App Delegate Files
- 5.4 MainWindow.xib
- 5.5 Root Controller's Content View
- 5.6 Writing a code for Root Controller
- 5.7 Implementing Content View
- 5.8 Animation - Transition
This chapter is largely based on Beginning iPhone 3 Development
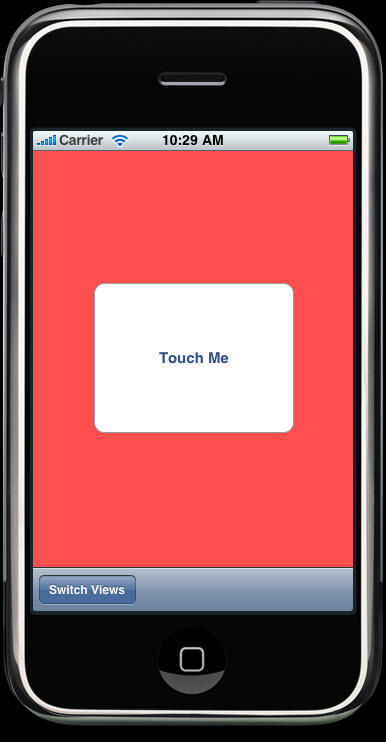
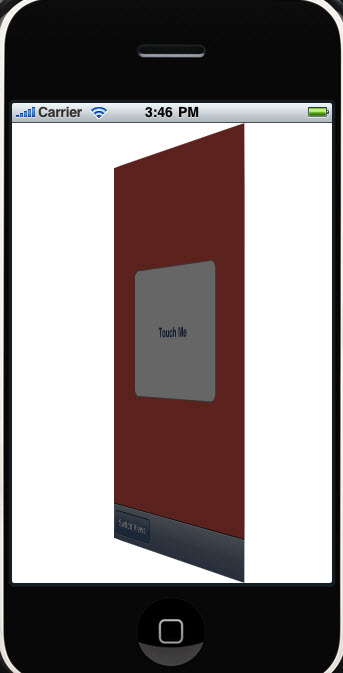
In this example, at the start we will have main view which we call it root view. This has two buttons. One for switching views and the other one for alert window.
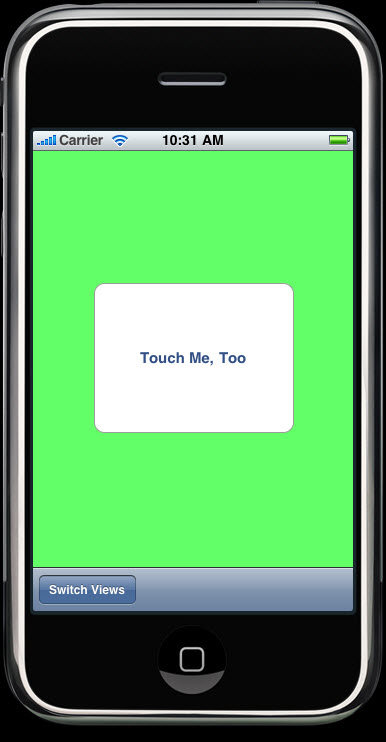
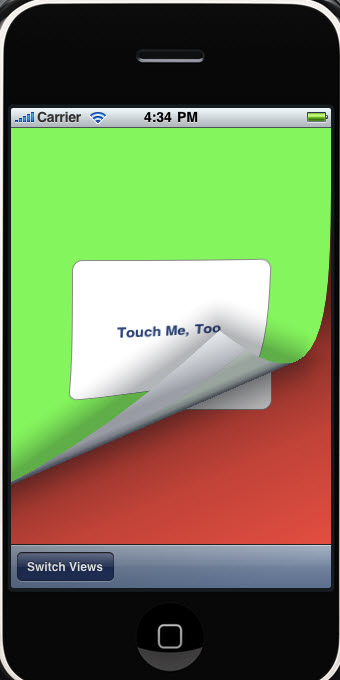
If we click the Switch Views button, we will have a similar view with green background. This is not the result of just changing the background color but a separate view we made at run time.
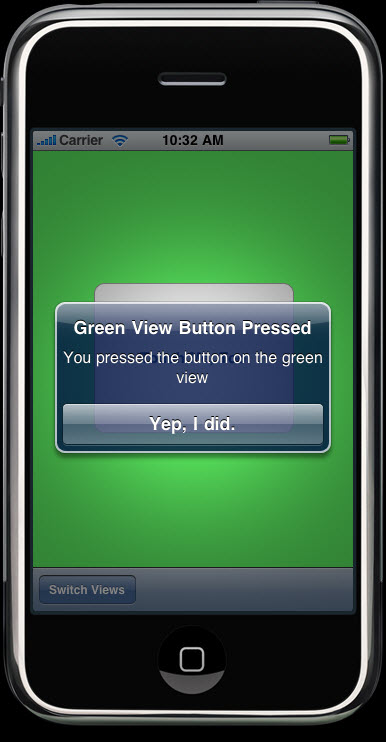
When Touch Me button pressed, we have an alert.
Unlike the previous examples, we will start with much simpler project template which is Window-based Application. File->New Project, type in MultiViews for the project name.
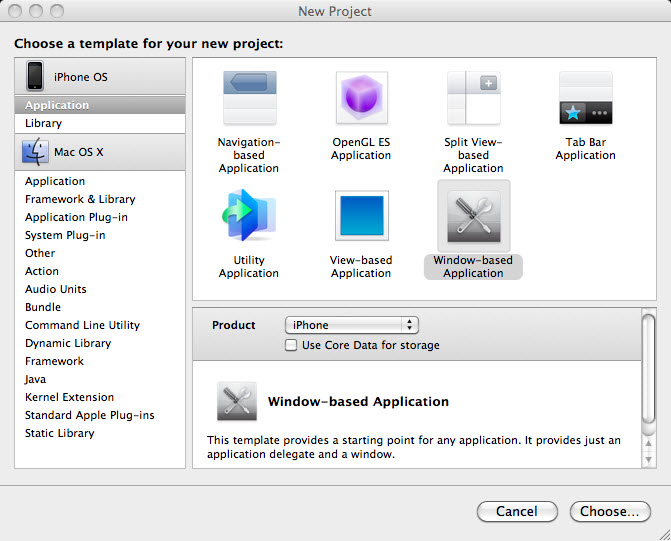
As you see, we have only a single nib file, MainWindow.xib and the MultiViews-info.plist file.
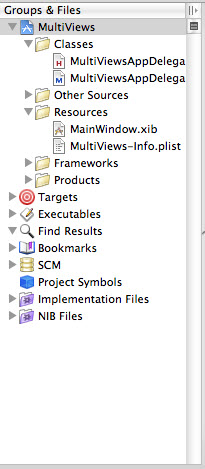
In the class folder we have two files that implement the application delegate.
So, we should make whatever we need by ourselves not by Xcode.
Xcode's Code Sense, of course, will help us to write our code faster.
Let's make ViewController subclass.
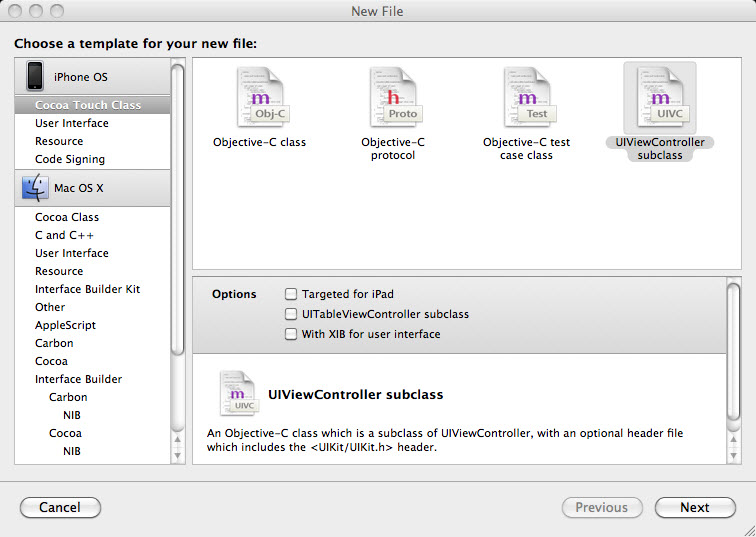
Choose Cocoa Touch Class from the pane in the left side, then select UIViewController subclass as in the picture and click Next.
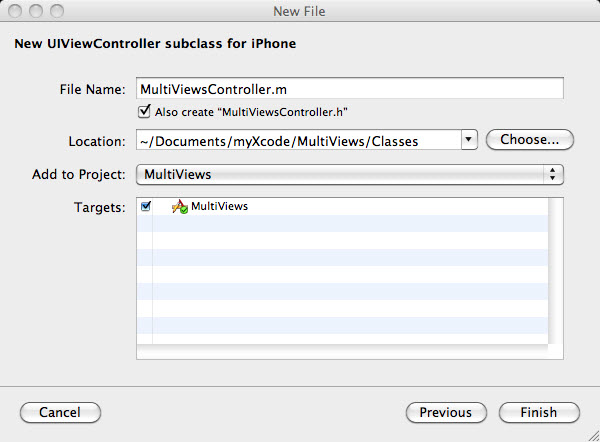
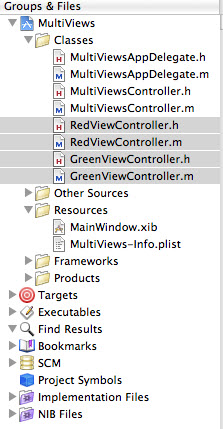
Click Finish. Then, we will see two files have been added to the classes folder. This MultiViewsController class will be our root controller that swaps the other views.
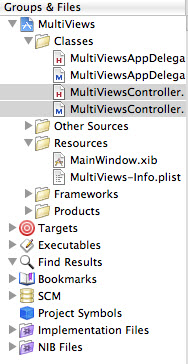
We need to repeat this two times to make RedViewController and GreenViewController class files.
Let's make two more nib files, one for each of the two content views we just created. Select Resources and then choose New File... from the File menu.
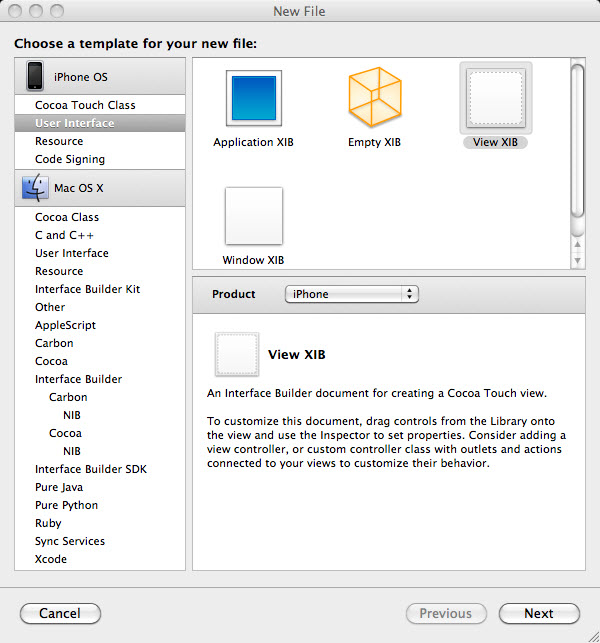
This time we selected User Interfaces instead of Cocoa Touch Classes. By choosing ViewXIB template, we will create a nib with a content view. Click Next button. Name it RedView.xib and the GreenView.xib.
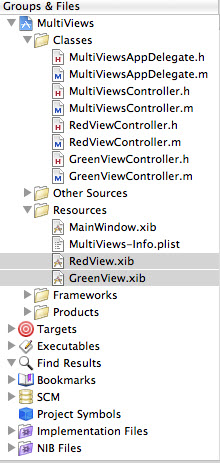
Now, we have all the files we need.
Let's start connecting everything together.
Cocoa Touch uses delegates extensively. Delegates are classes that are responsible for doing certain things for another object. The application delegate lets us do things at certain predefined times for UIApplication class. Every iPhone application has one and only instance of UIApplication, which takes responsibility for the application's run loop and handles application-level functionality such as routing input to the appropriate controller class.
UIApplication is a standard part of the UIKit, and it does its job mostly behind the scenes. You do not have to worry about it for the most part. At certain well-defined times during an application's run, however, UIApplication will call specific delegate methods if there is a delegate and if it implements that method.
For instance, if you have a code that requires to fire just before your code quits, you may want to implement the method applicationWillTerminate: in your application delegate and put your termination code there.
This type of delegation allows our application to implement common application-wide behavior without the need for subclassing UIApplication or the knowledge of anything about its inner working.
Let's make some changes to the file "MultiViewsAppDelegate.h"
#import <UIKit/UIKit.h> @class MultiViewsController; @interface MultiViewsAppDelegate : NSObject{ IBOutlet UIWindow *window; IBOutlet MultiViewsController *MultiViewsController; } @property (nonatomic, retain) UIWindow *window; @property (nonatomic, retain) MultiViewsController *multiViewsController; @end
The IBOutlet we've just added is an outlet for our app's root controller. We need this outlet because we are going to write a code that adds the root controller's view to our app's main window when the app launches. By doing this, when we add an instance of the MultiViewsController class to MainWindow.xib, we will already have an outlet for connection.
It's time to add the root controller's view to our app's main window.
File "MultiViewsAppDelegate.m"
#import "MultiViewsAppDelegate.h"
#import "MultiViewsController.h"

@implementation MultiViewsAppDelegate

@synthesize window;
@synthesize multiViewsController;

- (void)applicationDidFinishLaunching:(UIApplication *)application {

    // Override point for customization after app launch
    [window addSubview:multiViewsController.view];
    [window makeKeyAndVisible];
}

- (void)dealloc {
    [window release];
    [multiViewsController release];
    [super dealloc];
}

@end
Note that we are not only implementing the multiViewsController outlet but also we are adding the root controller's view to the window. The window is the only gateway to the user. So, any display to the user should be added as a subview of the app's window.
Let's work on the MultiViewsController.h.
Since we will be adding an instance of MultiViewsController
to MainWindow.xib, let's add any outlets and actions to this .h file.
#import <UIKit/UIKit.h>

@class RedViewController;
@class GreenViewController;

@interface MultiViewsController : UIViewController {
	RedViewController *redViewController;
	GreenViewController *greenViewController;
}
@property (retain, nonatomic) RedViewController *redViewController;
@property (retain, nonatomic) GreenViewController *greenViewController;

-(IBAction)multiViews:(id)sender;
@end
Since we've declared the action method needed, it's time to add an instance of this class to MainWindow.xib.
Let's open Interface Builder. We should see four icons: File's Owner, First Responder, MultiViewsAppDelegate, and Window.
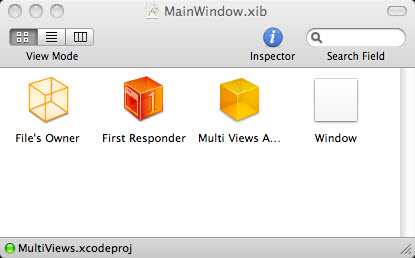
Where is MultiViewController icon?
We should make it by ourselves since Interface Builder's library does
not have such a Controller.
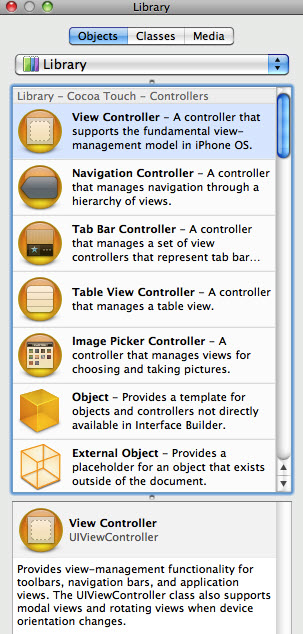
Because what we want to add is a subclass of UIViewController,
we should look for View Controller, drag it from the library to
the nib's main window.
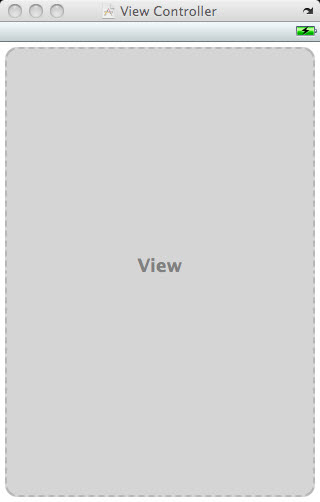
Then we will have five icons and a new window with View label
and View Controller window title.
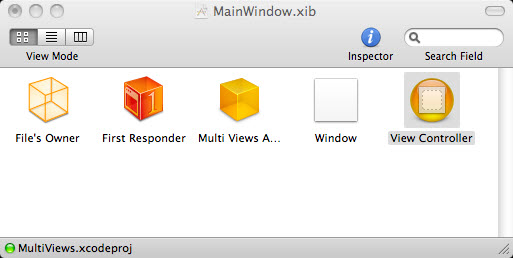
What we just added was an instance of UIViewController. However, what we need was an instance of MultiViewsController. So, let's change our view controller's class to MultiViewsController. Open up identity inspector after selecting the View Controller icon.

Note also, the View Controller icon has changed to MultiViewController icon.

Let's build our root controller's view. Its content will consist of a toolbar that will be placed at the bottom of the view. Remember that the MultiViewsController is responsible for switching between red view and the green view when the user press a button on the toolbar.
Drag a View from the library onto the dashed gray window labeled with View. Then drag a toolbar from the library into the View. After changing the label for the button to "Switch Views", it should be like the picture below.
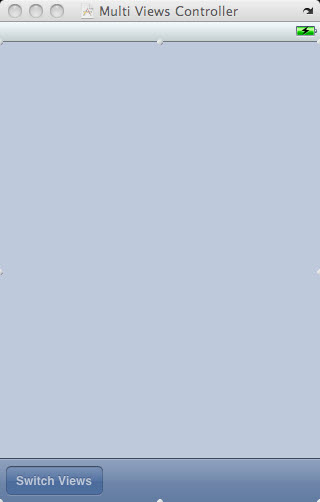
Select the Multi Views button, control-drag over to Multi Views Controller. Then select the multiViews: action method.
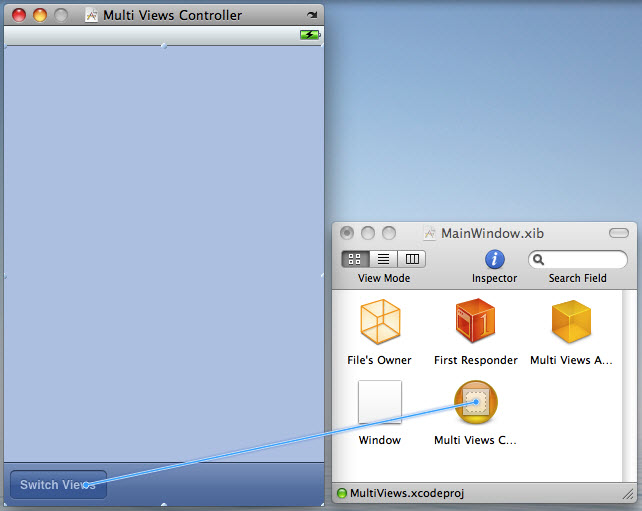
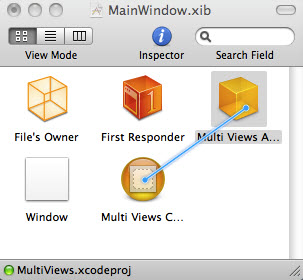
Now, we should connect the instance of MultiViewsController in our nib to the outlet, multiViewsController.
#import "MultiViewsController.h"
#import "RedViewController.h"
#import "GreenViewController.h"

@implementation MultiViewsController
@synthesize redViewController;
@synthesize greenViewController;

- (void)viewDidLoad
{
	RedViewController *redController = [[RedViewController alloc] initWithNibName:@"RedView" bundle:nil];
	self.redViewController = redController;
	[self.view insertSubview:redController.view atIndex:0];
	[redController release];
}

- (id)initWithNibName:(NSString *)nibNameOrNil bundle:(NSBundle *)nibBundleOrNil {
	if (self = [super initWithNibName:nibNameOrNil bundle:nibBundleOrNil]) {
	}
	return self;
}

- (IBAction)switchViews:(id)sender
{
    if (self.greenViewController.view.superview == nil)
    {
        if (self.greenViewController == nil)
        {
            GreenViewController *greenController =
            [[GreenViewController alloc] initWithNibName:@"GreenView"
                                                   bundle:nil];
            self.greenViewController = greenController;
            [greenViewController release];
        }
        [redViewController.view removeFromSuperview];
        [self.view insertSubview:greenViewController.view atIndex:0];
    }
    else
    {
        if (self.redViewController == nil)
        {
            RedViewController *redController =
            [[RedViewController alloc] initWithNibName:@"RedView"
                                                 bundle:nil];
            self.redViewController = redController;
            [redController release];
        }
        [greenViewController.view removeFromSuperview];
        [self.view insertSubview:redViewController.view atIndex:0];
    }
}

- (BOOL)shouldAutorotateToInterfaceOrientation:(UIInterfaceOrientation)interfaceOrientation {
	// Return YES for supported orientations
	return (interfaceOrientation == UIInterfaceOrientationPortrait);
}

- (void)didReceiveMemoryWarning {
    // Releases the view if it doesn't have a superview
    [super didReceiveMemoryWarning];
    // Release anything that's not essential, such as cached data
    if (self.redViewController.view.superview == nil)
        self.redViewController = nil;
    else
        self.greenViewController = nil;
}

- (void)dealloc {
	[greenViewController release];
	[redViewController release];
	[super dealloc];
}
@end
The method "viewDidLoad" was overridden to created
an instance of RedView Controller.
It overrides a UIViewController method that gets called when the nib is loaded.
The "initWithNibName" method is used to load the RedViewController instance
from the RedView.xib file.
After the RedViewController is created, this new instance is assigned to
redViewController property:
	RedViewController *redController =
           [[RedViewController alloc] initWithNibName:@"RedView" bundle:nil];
	self.redViewController = redController;
What's the relationship between MultiViewsController and RedViewController.
RedViewController is the subview of the MultiViewsController which is root view.
So, we inserted the red view as a subview of the root view.
We insert it at index 0. This tells iPhone to put red view behind everything else.
So, the toolbar will always on top and is visible:
Note that we did not load the green view here. We load it when we need it. It is called lazy loading. We load it at the action method switchViews: It first checks which view is being swapped in a the line:
if (self.greenViewController.view.superview == nil)
This will be YES if greenViewController exists though not being visible yet. In this case, the view does not have superview because it's not in the view hierarchy yet. The line will return YES if greenViewController yet to be created. So, when the line returns YES and if greenViewController is nil, we will create the instance as we've done in viewDidLoad method.
When we reach the following line:
self.greenViewController = greenController;
[greenViewController release];
we know that we have a greenViewController instance. So, we can remove redViewController's view from the view hierarchy and add greenViewController's view:
[redViewController.view removeFromSuperview];
[self.view insertSubview:greenViewController.view atIndex:0];
"RedViewController.h"
#import@interface RedViewController : UIViewController { } -(IBAction)redButtonPressed:(id)sender; @end
"GreenViewController.h" are:
#import@interface GreenViewController : UIViewController { } - (IBAction)greenButtonPressed:(id)sender; @end
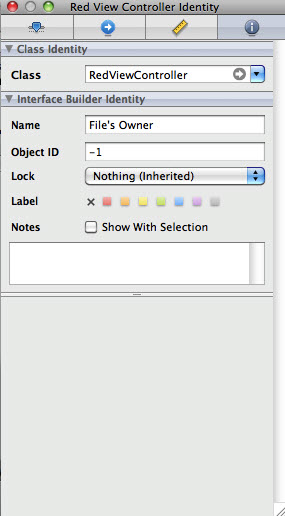
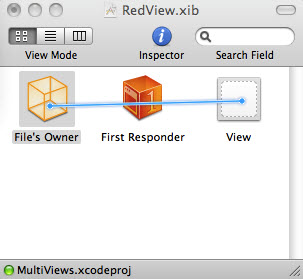
Now, we set the File's Owner defaults to RedViewController from NSObject. Do this using identity inspector.
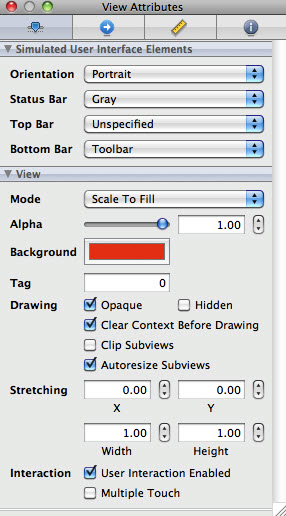
Next, we set the View. When it comes to the size of the view, we should consider the toolbar as we selected the Toolbar from combo options in the Bottom Bar item under Simulated User Interface Elements. Then, set the background color in the Background Item under View. All these are done using attribute inspector.
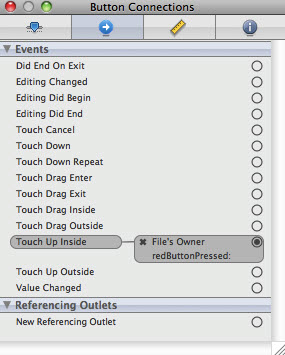
Also, we need put "Touch Me" button from Round Rect Button from the Library. Then using connections inspector, set connect Touch Up Inside event to redButtonPressed action method.
Another thing to be done here is to connect the RedViewController's view outlet to the view in the nub. The view outlet is inherited from UIViewController, and gives the controller access to the view it controls. When we changed the class of the File's Owner, the existing outlet connection were broken. So we need to reestablish the connection from the controller to its view.
We need to do the same thing to the GreenViewController.
Then, let's implement each views.
"RedViewController.m"
#import "RedViewController.h"


@implementation RedViewController

- (IBAction)redButtonPressed:(id)sender
{
	UIAlertView *alert = [[UIAlertView alloc] initWithTitle:@"Red View Button Pressed"
                                     message:@"You pressed the button on the red view"
                                     delegate:nil cancelButtonTitle:@"Yep, I did."
                                     otherButtonTitles:nil];
	[alert show];
	[alert release];
}

- (id)initWithNibName:(NSString *)nibNameOrNil bundle:(NSBundle *)nibBundleOrNil {
	if (self = [super initWithNibName:nibNameOrNil bundle:nibBundleOrNil]) {
		// Initialization code
	}
	return self;
}

- (BOOL)shouldAutorotateToInterfaceOrientation:(UIInterfaceOrientation)interfaceOrientation {
	// Return YES for supported orientations
	return (interfaceOrientation == UIInterfaceOrientationPortrait);
}

- (void)didReceiveMemoryWarning {
	[super didReceiveMemoryWarning]; // Releases the view if it doesn't have a superview
	// Release anything that's not essential, such as cached data
}

- (void)dealloc {
	[super dealloc];
}
@end
"GreenViewController.m"
#import "GreenViewController.h"

@implementation GreenViewController
-(IBAction)greenButtonPressed:(id)sender
{
	UIAlertView *alert = [[UIAlertView alloc] initWithTitle:@"Green View Button Pressed"
                                     message:@"You pressed the button on the green view"
                                     delegate:nil
                                     cancelButtonTitle:@"Yep, I did."
                                     otherButtonTitles:nil];
	[alert show];
	[alert release];
}

- (id)initWithNibName:(NSString *)nibNameOrNil bundle:(NSBundle *)nibBundleOrNil {
	if (self = [super initWithNibName:nibNameOrNil bundle:nibBundleOrNil]) {
		// Initialization code
	}
	return self;
}

- (BOOL)shouldAutorotateToInterfaceOrientation:(UIInterfaceOrientation)interfaceOrientation {
	// Return YES for supported orientations
	return (interfaceOrientation == UIInterfaceOrientationPortrait);
}

- (void)didReceiveMemoryWarning {
	[super didReceiveMemoryWarning]; // Releases the view if it doesn't have a superview
	// Release anything that's not essential, such as cached data
}


- (void)dealloc {
	[super dealloc];
}
@end
Build and Run.
UIView has several methods we can call to tell how the transition should be implemented including the period of the transition.
So, instead of abrupt change of the view, we have smooth transitions.
We modified switchViews: method of MultiViewsController.m
- (IBAction)switchViews:(id)sender
{
    [UIView beginAnimations:nil context:nil];
    [UIView setAnimationDuration:1.25];
    [UIView setAnimationCurve:UIViewAnimationCurveEaseInOut];

    if (self.greenViewController.view.superview == nil)
    {
        if (self.greenViewController == nil)
        {
            GreenViewController *greenController =
            [[GreenViewController alloc] initWithNibName:@"GreenView"
                                                   bundle:nil];
            self.greenViewController = greenController;
            [greenViewController release];
        }
        [UIView setAnimationTransition:
               UIViewAnimationTransitionFlipFromRight
                               forView:self.view cache:YES];

        [redViewController viewWillAppear:YES];
        [greenViewController viewWillDisappear:YES];
        [redViewController.view removeFromSuperview];
        [self.view insertSubview:greenViewController.view atIndex:0];
        [greenViewController viewDidDisappear:YES];
        [redViewController viewDidAppear:YES];
    }
    else
    {
        if (self.redViewController == nil)
        {
            RedViewController *redController =
            [[RedViewController alloc] initWithNibName:@"RedView"
                                                 bundle:nil];
            self.redViewController = redController;
            [redController release];
        }
        [UIView setAnimationTransition:
             UIViewAnimationTransitionFlipFromLeft
                               forView:self.view cache:YES];

        [greenViewController viewWillAppear:YES];
        [redViewController viewWillDisappear:YES];
        [greenViewController.view removeFromSuperview];
        [self.view insertSubview:redViewController.view atIndex:0];
        [redViewController viewDidDisappear:YES];
        [greenViewController viewDidAppear:YES];
    }
    [UIView commitAnimations];
}
To do animation, we need to declare an animation block and the duration of the animation.
    [UIView beginAnimations:nil context:nil];
    [UIView setAnimationDuration:1.25]
Next thing to do is to set the animation curve. What we used here was changing speed of animation instead of keeping constant speed. So, animation is slower at the beginning and end of the transition:
[UIView setAnimationCurve:UIViewAnimationCurveEaseInOut];
Then, we need to specify the transition to use from four view transitions available:
- UIViewAnimationTransitionFlipFromLeft
- UIViewAnimationTransitionFlipFromRight
- UIViewAnimationTransitionCurlUp
- UIViewAnimationTransitionCurlDown
We used two transition views in this tutorial: 1st and 3rd.
Also, note that we cached a snapshot of the view to avoid redrawing:
[UIView setAnimationTransition:
        UIViewAnimationTransitionFlipFromRight
            forView:self.view cache:YES];
When we are all done for animation, we call "commitAniamtions" on UIView. Everything between the start of the animation block and the call to "commitAnimations" will be animated together.
Save nib. Build and Run.