Chapter 7. Table Views
- 7.0 Preview
- 7.1 Simplest Table
- 7.2 Simplest Table: Controller
- 7.3 Simplest Table with Image
- 7.4 Simplest Table - Cell Styles
- 7.5 Simplest Table - Configurations
- 7.6 Table View Cells
- 7.7 Table View Cells - Subclassing UITableViewCell
- 7.8 Table View Cells - Grouped and Indexed Sections
- 7.9 Search Bar
Table views are the most commonly used to display list of data to the user. Table view is an instance of the UITableView. Each visible row of the table is implemented by UITableViewCell class. So, a table view is the object displaying the visible part of a table, and a table view cell is responsible for displaying a single row of a table. In other words, each view is an instance of UITableView, and each visible row is an instance of UITableViewCell.
Table views get their configuration data from an object that conforms to the UITableViewDelegate protocol and row data from an object conforms to the UITableView DataSource protocol.
The same tableview can be displayed as a grouped table or a plain table with/ without an index.
Each division of table is a section. So, in a grouped table, each group is a section. In an indexed table, each indexed grouping of data is a section.
This chapter is largely based on Beginning iPhone 3 Development
OK. The simplest table!
This table will display a list of text.
Let's start with view-based application template.
View-based application template provides a starting point for an application that uses a single view. It provides a view controller to manage the view, and a nib file that contains the view.
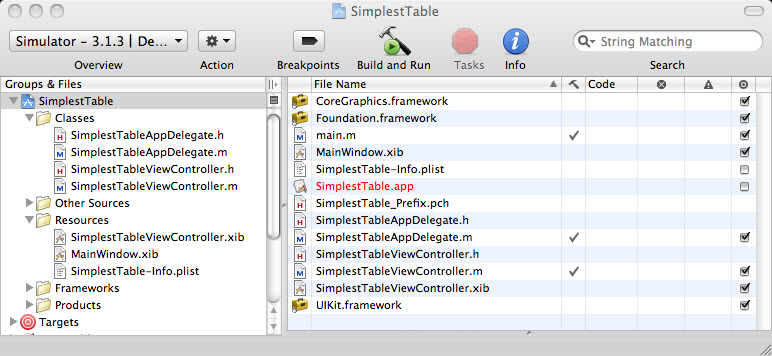
Let's open Interface Builder by double-clicking the SimplestTableViewController.xib.
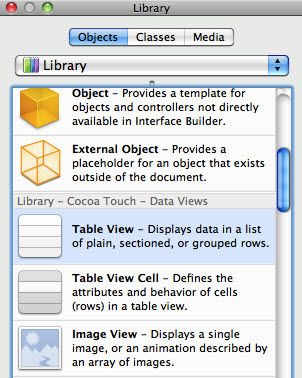
Then drag the Table View from the library over to the View window.
Keep the Table View being selected, bring up connections inspector.
Let's make our controller class for datasource and delegate for this
table.
How?
Connect the circles for both dataSource and delegate to File's owner icon.

Save nib and back to Xcode.
Now, it's time to write a code. Let's look at "SimplestTableViewController.h".
#import <UIKit/UIKit.h>

@interface SimplestTableViewController : UIViewController

{
    NSArray *listData;
}
@property (nonatomic, retain) NSArray *listData;
@end
We are making SimplestTableViewController class conforming to the protocols so that it can act as the delegate and datasource for the table view. Then, we declare an array listData which will hold the data to be displayed.
And the implementation file, "SimplestTableViewController.m".
#import "SimplestTableViewController.h"
@implementation SimplestTableViewController
@synthesize listData;
- (void)viewDidLoad {
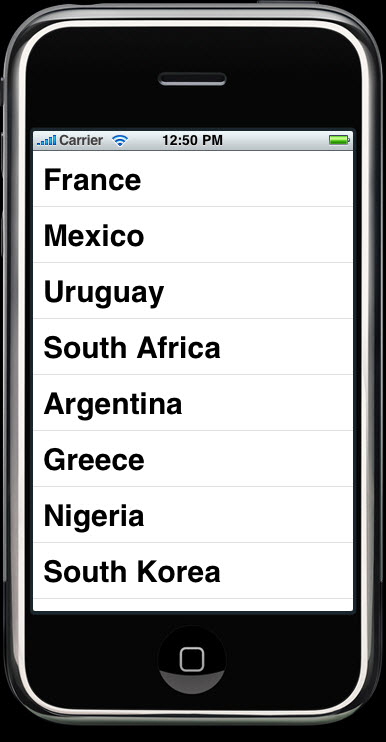
NSArray *array = [[NSArray alloc] initWithObjects:
@"France", @"Mexico", @"Uruguay", @"South Africa",
@"Argentina", @"Greece", @"Nigeria", @"South Korea",
@"England", @"USA", @"Slovenia",@"Algeria",
@"Germany", @"Serbia", @"Ghana", @"Australia",
@"Denmark", @"Netherlands", @"Cameroon", @"Japan",
@"Italy", @"Slovakia", @"Paraguay",@"New Zealand",
@"Brazil", @"Portugal", @"Ivory Coast",@"North Korea",
@"Spain", @"Chile", @"Switzerland", @"Hunduras",nil ];
self.listData = array;
[array release];
[super viewDidLoad];
}
- (void)viewDidUnload {
// Release any retained subviews of the main view.
// e.g. self.myOutlet = nil;
self.listData = nil;
[super viewDidUnload];
}
- (void)dealloc {
[listData release];
[super dealloc];
}
#pragma mark -
#pragma mark Table View Data Source Methods
- (NSInteger)tableView:(UITableView *)tableView
numberOfRowsInSection:(NSInteger)section
{
return [self.listData count];
}
- (UITableViewCell *)tableView:(UITableView *)tableView
cellForRowAtIndexPath:(NSIndexPath *)indexPath
{
static NSString *SimplestTableIdentifier = @"SimplestTableIdentifier";
UITableViewCell *cell = [tableView dequeueReusableCellWithIdentifier:
SimplestTableIdentifier];
if (cell == nil) {
cell = [[[UITableViewCell alloc]
initWithStyle:UITableViewCellStyleDefault
reuseIdentifier: SimplestTableIdentifier] autorelease];
}
NSUInteger row = [indexPath row];
cell.textLabel.text = [listData objectAtIndex:row];
cell.textLabel.font = [UIFont boldSystemFontOfSize:30];
return cell;
}
- (void)tableView:(UITableView *)tableView
didSelectRowAtIndexPath:(NSIndexPath *)indexPath
{
NSUInteger row = [indexPath row];
NSString *rowValue = [listData objectAtIndex:row];
NSString *message = [[NSString alloc] initWithFormat:
@"You selected %@", rowValue];
UIAlertView *alert = [[UIAlertView alloc]
initWithTitle:@"Row Selected!"
message:message
delegate:nil
cancelButtonTitle:@"Yes I Did"
otherButtonTitles:nil];
[alert show];
[message release];
[alert release];
[tableView deselectRowAtIndexPath:indexPath animated:YES];
}
- (CGFloat)tableView:(UITableView *)tableView
heightForRowAtIndexPath:(NSIndexPath *)indexPath
{
return 56;
}
@end
In viewDidLoad, we are creating an array to pass over to the table. As we've seen in the previous chapter, the data array may come from other source such as a text file, ULR, or property list.
Let's look at one of the two datasource methods:
- tableView:numberOfRowsInSection:
This is used by the table to ask how many rows are in a particular section. The default number of sections is one. This method is called to get the number of rows in the one section which makes up the list. Here, we just return the number of items in the array. - (UITableViewCell *)tableView:(UITableView *)tableView cellForRowAtIndexPath:(NSIndexPath *)indexPath {This method is called by the table view when it needs to draw its row. Note that the second argument to the method is indexPath which is an NSIndexPath instance. This is the mechanism that table views is using to wrap the section and row into a single object. To get the row or the section out of an NSIndexPath, you call either its row method or its section method. Both of them will return an int.
The first argument, tableView, is a reference to the table which is asking. This let us create classes that act as a datasource for multiple tables.
In the method, we declare a static string.static NSString *SimplestTableIdentifier = @"SimplestTableIdentifier";
We will use this string as a key to a single table cell.
Whenever a table view cell scrolls off the screen, the change that another one just rolled onto the screen on the other side is pretty high. If that new row can just reuse one of the cells that has already rolled off the screen, the system can avoid the overhead associated with constantly creating an releasing those views. To take advantage of this mechanism, we will ask the table view to give us one of its dequeued cells of the type we want. Notice that we are making using of the NString identified we declared. In effect, we are asking for a reusable cell of type SimplestTableIdentifier:UITableViewCell *cell = [tableView dequeueReusableCellWithIdentifier: SimplestTableIdentifier];We check call after the call to see whether it's nil because it's possible that the table view may not have any spare cell. If it's nil, we manually create a new table view cell using that identifier string. And at some point, we will reuse one of the cells we create here, so we need to make sure it has the correct type.if (cell == nil) { cell = [[[UITableViewCell alloc] initWithStyle:UITableViewCellStyleDefault reuseIdentifier: SimplestTableIdentifier] autorelease];Now that we have a table view cell that we can return for the table vie to use, next thing is placing the information in this cell. Displaying text in a row of a table is a very common task. So, the table view cell has a UILabel property called textLabel that we can set to display string. Let's get the right string our of our listData array and use it to set the cell's textLabel.
How we get the correct value?
We should know which row the table view is asking for. We get that information form the indexPath variable:NSUInteger row = [indexPath row];
We are using the row number of the table to get the corresponding string from the array, and assign it to the cell's textLabel.text property. Then, we return the cell.cell.textLabel.text = [listData objectAtIndex:row]; return cell;
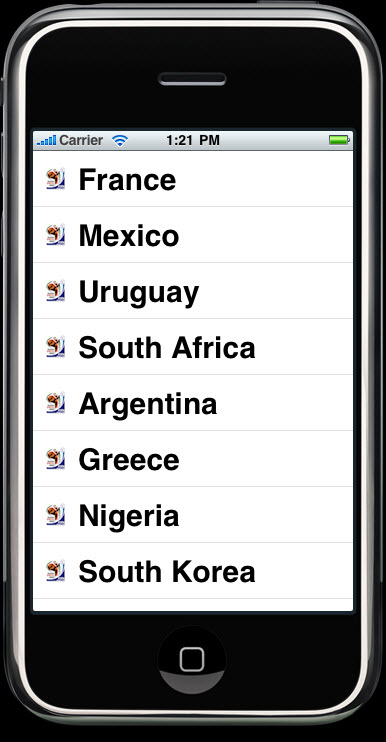
Build and Run. Then we will have:
How do we add an image for each list?
Do we have to do subclassing UITableViewCell or add subviews?
No, fortunately, the default table view cell can handle it.
Put the image file  "2010WorldCup.png" into Resources folder.
Let's go to the code. Modify the method tableView:sellForRowAtIntex: from the file "SimplestTableViewController.m":
- (UITableViewCell *)tableView:(UITableView *)tableView
         cellForRowAtIndexPath:(NSIndexPath *)indexPath {
static NSString *SimplestTableIdentifier = @"SimplestTableIdentifier";
UITableViewCell *cell = [tableView dequeueReusableCellWithIdentifier:
                             SimplestTableIdentifier];
if (cell == nil) {
    cell =
        [[[UITableViewCell alloc] initWithStyle:UITableViewCellStyleDefault
        reuseIdentifier: SimplestTableIdentifier] autorelease];
}
UIImage *image = [UIImage imageNamed:@"2010WorldCup.png"];
cell.imageView.image = image;
NSUInteger row = [indexPath row];
cell.textLabel.text = [listData objectAtIndex:row];
cell.textLabel.font = [UIFont boldSystemFontOfSize:30];
return cell;
}
Now that each cell has an imageView property and each imageView has an image property and a highlightedImage property. The image appears to the left of the cell's text.
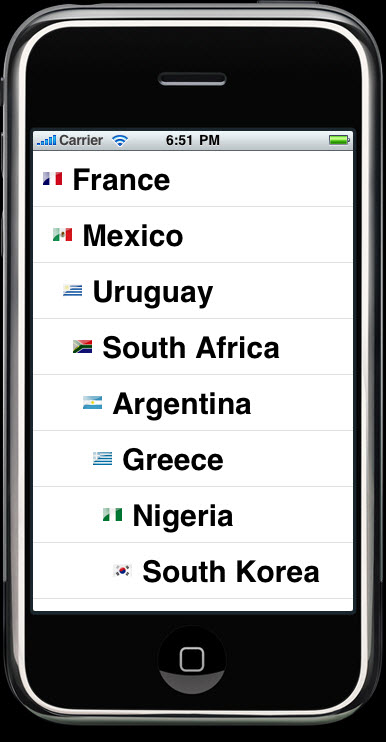
We can use different image for each of the country as in the picture below.
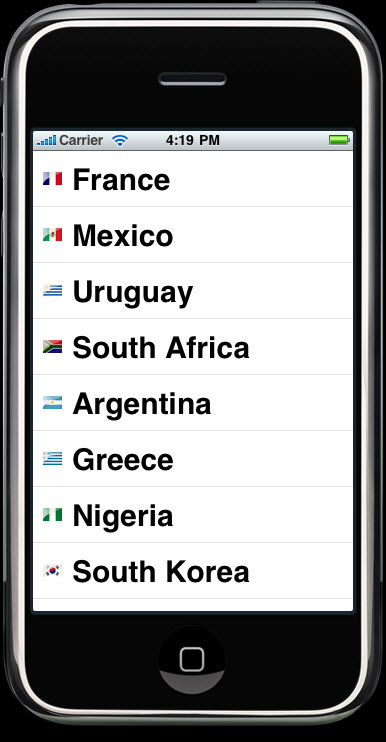
Part of the code has been changed.
- (UITableViewCell *)tableView:(UITableView *)tableView
         cellForRowAtIndexPath:(NSIndexPath *)indexPath
{
    static NSString *SimplestTableIdentifier = @"SimplestTableIdentifier";

    UITableViewCell *cell = [tableView dequeueReusableCellWithIdentifier:
                             SimplestTableIdentifier];
    if (cell == nil) {
        cell = [[[UITableViewCell alloc]
				 initWithStyle:UITableViewCellStyleDefault
				 reuseIdentifier: SimplestTableIdentifier] autorelease];
    }


    NSUInteger row = [indexPath row];
    NSString *rowValue = [listData objectAtIndex:row];
    NSString *imgValue = [rowValue stringByAppendingString: @".gif"];
    UIImage *image = [UIImage imageNamed:imgValue];

	cell.imageView.image = image;
    row = [indexPath row];
    cell.textLabel.text = [listData objectAtIndex:row];
    cell.textLabel.font = [UIFont boldSystemFontOfSize:30];

    return cell;
}
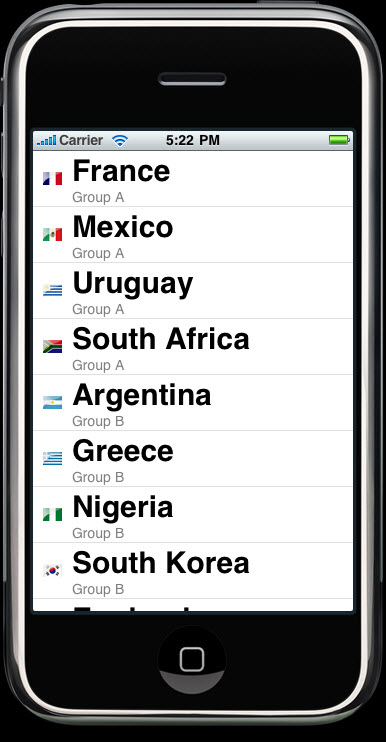
Prior to SDK 3.0, iPhone SDK were limited to a single cell style. But with the release of SDK 3.0, a bit more variety has been added to the standard table sell design. Cell style has three different cell elements:
- Image
If an image is part of the specified style, the image is displayed to the left of the cell's text. - Text Label
This is the cell's primary text. In the style we used, UITableViewCellStyleDefault, the text label is the only text shown in the cell. - Detail Text Label
This is the cell's secondary text, usually it is used as an explanatory note or label.
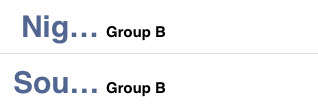
Add the following code to see what the new style looks like.
- (UITableViewCell *)tableView:(UITableView *)tableView
         cellForRowAtIndexPath:(NSIndexPath *)indexPath
{
    static NSString *SimplestTableIdentifier = @"SimplestTableIdentifier";

    UITableViewCell *cell = [tableView dequeueReusableCellWithIdentifier:
                             SimplestTableIdentifier];
    if (cell == nil) {
        cell = [[[UITableViewCell alloc]
				 initWithStyle:UITableViewCellStyleDefault
				 reuseIdentifier: SimplestTableIdentifier] autorelease];
    }

    NSUInteger row = [indexPath row];
    NSString *rowValue = [listData objectAtIndex:row];
	NSString *imgValue = [rowValue stringByAppendingString: @".gif"];
	UIImage *image = [UIImage imageNamed:imgValue];
	cell.imageView.image = image;
    row = [indexPath row];
    cell.textLabel.text = [listData objectAtIndex:row];
    cell.textLabel.font = [UIFont boldSystemFontOfSize:30];


    if (row < 4)
        cell.detailTextLabel.text = @"Group A";
    else if(row < 8)
        cell.detailTextLabel.text = @"Group B";
    else if(row < 12)
        cell.detailTextLabel.text = @"Group C";
    else if(row < 16)
        cell.detailTextLabel.text = @"Group D";
    else if(row < 20)
        cell.detailTextLabel.text = @"Group E";
    else if(row < 24)
        cell.detailTextLabel.text = @"Group F";
    else if(row < 28)
        cell.detailTextLabel.text = @"Group G";
    else
        cell.detailTextLabel.text = @"Group H";

    return cell;
}
When run this code, you won't see any difference from the previous run without those added lines. We need to change UITableViewCellStyleDefault to UITableViewCellStyleSubtitle.
if (cell == nil) {
    cell = [[[UITableViewCell alloc]

        // initWithStyle:UITableViewCellStyleDefault
        initWithStyle:UITableViewCellStyleSubtitle

        reuseIdentifier: SimplestTableIdentifier] autorelease];
}
If we use "initWithStyle:UITableViewCellStyleValue1", we get:
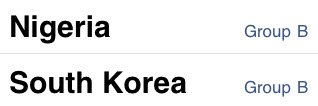
Or if we use "initWithStyle:UITableViewCellStyleValue2", we get:
Unlike the application we made in the previous chapter, our simplest table views does not require a delegate because datasource provides all the data needed to draw the table. The purpose of the delegate is to configure the appearance of the table view and to handle the user interactions.
Now, it's the time to look at the options for configuration.
Add the following lines to our code.
#pragma mark -
#pragma mark Table Delegate Methods

- (NSInteger)tableView:(UITableView *)tableView
indentationLevelForRowAtIndexPath:(NSIndexPath *)indexPath
{
    NSUInteger row = [indexPath row];
    return row;
}
This method sets the indent level for each row to its row number. So, row 0 will have an indent level 0, row 1 will have level 1, and so on.
Delegate for table use two methods which row has been selected by the user. One method called before the row selected and can be used to prevent from being selected or can even change which row should be selected. Let's make the first row is not selectable. To do that, we need to add the following method to the "SimplestTableViewController.m" file.
-(NSIndexPath *)tableView:(UITableView *)tableView
 willSelectRowAtIndexPath:(NSIndexPath *)indexPath
{
    NSUInteger row = [indexPath row];
    if (row == 0)
        return nil;

    return indexPath;
}
This method get indexPath as an argument. The indexPath represents the item that's about to get selected. If it's the first row, then it returns nil, which indicates that no row actually be selected. Otherwise, it returns indexPath.
These are already implemented in the code.
Font Size:
cell.textLabel.font = [UIFont boldSystemFontOfSize:30];
Row Height:
- (CGFloat)tableView:(UITableView *)tableView
heightForRowAtIndexPath:(NSIndexPath *)indexPath
{
    return 56;
}
Next Sections.
- 7.6 Table View Cells
- 7.7 Table View Cells - Subclassing UITableViewCell
- 7.8 Table View Cells - Grouped and Indexed Sections
- 7.9 Search Bar