pytune.com - Local dev with Apache mod_wsgi

This article is based on https://github.com/Einsteinish/PyTune.git
We may optionally want to install Fabric. Many common tasks, such as installing dependencies, deploying servers, migrations, and configurations are in fabfile.py. But I am not using Fabric to deploy the pytune app.
$ sudo pip install fabric
Check Java version:
$ javac -version
javac 1.8.0_72
install the following gems:
$ sudo gem install closure-compiler jsmin cssmin uglifier
Official guide : Install Elasticsearch.
Download the latest Elasticsearch version (2.3.1):
$ wget https://download.elastic.co/elasticsearch/release/org/elasticsearch/distribution/deb/elasticsearch/2.3.1/elasticsearch-2.3.1.deb
Then install it with the dpkg command like this:
$ sudo dpkg -i elasticsearch-2.3.1.deb
This will install Elasticsearch in /usr/share/elasticsearch/ with its configuration files placed in /etc/elasticsearch and its init script added in /etc/init.d/elasticsearch.
For automatic start/stop, we should add its init script to the default runlevels with the command:
$ sudo systemctl enable elasticsearch.service
The Elasticsearch configuration files are in the /etc/elasticsearch directory, and we have two files:
- elasticsearch.yml configures the Elasticsearch server settings.
- logging.yml configures logging.
The setting which determines the role of the server is called node.master. If we have only one Elasticsearch node, we should leave this option commented out so that it keeps its default value of true - i.e. the sole node should be also a master:
#node.master: true
Another important configuration option is node.data, which determines whether a node will store data or not. In most cases this option should be left to its default value (true):
# Allow this node to store data (enabled by default):
#
#node.data: true
Two other important options are index.number_of_shards and index.number_of_replicas. The first determines into how many pieces (shards) the index will be split into. The second defines the number of replicas which will be distributed across the cluster. Having more shards improves the indexing performance, while having more replicas makes searching faster.
Assuming that we are on a single node, it's better to start with only one shard and no replicas. Thus, their values should be set to the following (make sure to remove the # at the beginning of the lines):
# Note, that for development on a local machine, with small indices, it usually
# makes sense to "disable" the distributed features:
#
index.number_of_shards: 1
index.number_of_replicas: 0
One final setting which we may want to change is path.data, which determines the path where data is stored. The default path is /var/lib/elasticsearch.
In a production environment it's recommended that we use a dedicated partition and mount point for storing Elasticsearch data. In the best case, this dedicated partition will be a separate storage media which will provide better performance and data isolation. We can specify a different path.data path by uncommenting the path.data line and changing its value:
# Path to directory where to store index data allocated for this node.
#
path.data: /home/k/MySites/TEST/PyTune/elastic-search/data
Now, we can start Elasticsearch with the following command:
$ sudo service elasticsearch start
Values set for single Elasticsearch node:
- path.data: /var/lib/elasticsearch
- log: /var/log/elasticsearch
- cluster.name: This will be automatically set to the name of the default cluster.
- node.master: true
- node.data: true
Testing:
$ curl -X GET 'http://localhost:9200'
We should get the following response something like this:
{
  "name" : "Buzz",
  "cluster_name" : "elasticsearch",
  "version" : {
    "number" : "2.3.1",
    "build_hash" : "bd980929010aef404e7cb0843e61d0665269fc39",
    "build_timestamp" : "2016-04-04T12:25:05Z",
    "build_snapshot" : false,
    "lucene_version" : "5.5.0"
  },
  "tagline" : "You Know, for Search"
}
Or we can check the health of the cluster:
$ curl -XGET http://localhost:9200/_cluster/health?pretty
{
  "cluster_name" : "elasticsearch",
  "status" : "green",
  "timed_out" : false,
  "number_of_nodes" : 1,
  "number_of_data_nodes" : 1,
  "active_primary_shards" : 0,
  "active_shards" : 0,
  "relocating_shards" : 0,
  "initializing_shards" : 0,
  "unassigned_shards" : 0,
  "delayed_unassigned_shards" : 0,
  "number_of_pending_tasks" : 0,
  "number_of_in_flight_fetch" : 0,
  "task_max_waiting_in_queue_millis" : 0,
  "active_shards_percent_as_number" : 100.0
}
Virtualenv is to create isolated environments, each running their own versions of packages. It is the tool in Python which helps in creating new virtual environments for our projects. Since it has its own install directories, we can be isolated from the system directories:
To install it, we do:
$ sudo pip install virtualenv
$ sudo virtualenv venv
To activate:
$ source venv/bin/activate
Now, let's install our assorted packages:
(venv)$ pip install -r requirements.txt
We may get an error for scipy. In that case:
$ sudo apt-get install libpq-dev python-dev
(venv)$ pip install -r requirements.txt
We may also want to install the following on Ubuntu 16 system. In my case, I got "cannot find ncurse" error when I trying "pip install -r requirements.txt":
$ sudo apt-get install libncurses5-dev libncursesw5-dev
In fabfile.py there are two paths that need to be configured.
- env.paths.PYTUNE is the relative path to the PyTune repository.
- env.paths.VENDOR is the relative path to where all downloaded code should go.
In local_settings.py there are a few paths that need to be configured. Configure these after the installation below.
If we are on Ubuntu, we can simply use Fabric to install PyTune and its many components. PyTune is designed to run on three separate servers: an app server, a db server, and assorted task servers. To install everything on a single machine, read through fabfile.py and setup all three servers without repeating the setup_common steps.
(venv)$ pip install paramiko
(venv)$ python fabfile.py
We may need to install the following packages as well:
(venv)$ pip install urllib3
(venv)$ pip install pyopenssl
(venv)$ pip install python-oauthlib
Before we run our local server, we need to setup other thing.
MongoDB setting in settings.py:
MONGO_DB = {
    'host': 'localhost:27017',
Due to the dependency of apps, we create the tables in this order:
$ ./manage.py migrate auth
$ ./manage.py migrate sites
$ ./manage.py migrate
OperationalError at /
(1045, "Access denied for user 'pytune'@'localhost' (using password: NO)")
Here is how we create a user and database:
(venv)$ mysql -u root -p
mysql> CREATE DATABASE pytunedb;
mysql> CREATE USER 'pytune'@'localhost' IDENTIFIED BY 'password';
mysql> GRANT ALL PRIVILEGES ON * . * TO 'pytune'@'localhost';
mysql> Flush Privileges;
We should check if the password is set properly in local_settings.py.
Another error:
DatabaseError at /
(1146, "Table 'pytune.django_site' doesn't exist")
Then load up the database with empty PyTune tables and bootstrap the database:
(venv)$ ./manage.py syncdb --all
You just installed Django's auth system, which means you don't have any superusers defined.
Would you like to create one now? (yes/no): No
...
(venv)./manage.py migrate --fake
(venv)./manage.py migrate
(venv)./manage.py loaddata config/fixtures/bootstrap.json
Now, we want to create a superuser:
(venv)python manage.py createsuperuser
Run the development server. At this point, all dependencies should be installed and no additional configuration is needed.
$ ./manage.py runserver
Validating models...
...
Django version 1.5.12, using settings 'settings'
Development server is running at http://127.0.0.1:8000/
Adding a new rss may get an error if scipy is not installed:
Oh no, there was an error
When we try to run the app on a browser, we may get the following error:
NotUniqueError at /
Tried to save duplicate unique keys (E11000 duplicate key error index: pytunedb.social_profile.$user_id_1 dup key: { : 2 })
At login with pytune user, got the following error:
Error -2 connecting to db_redis_sessions:6379. Name or service not known.
It can be fixed by setting host as "localhost":
REDIS_SESSIONS = {
#    'host': 'db_redis_sessions',
     'host': 'localhost',
}
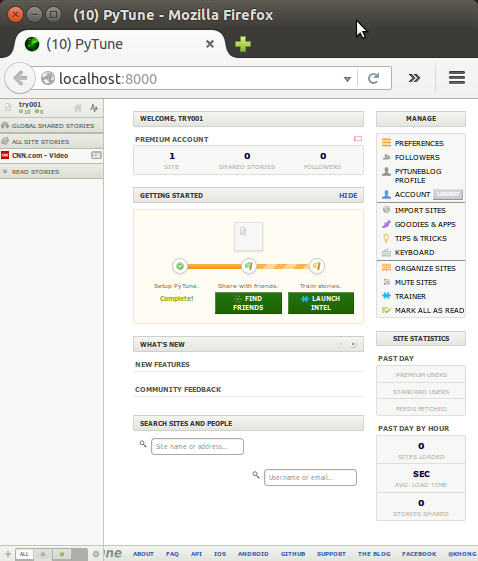
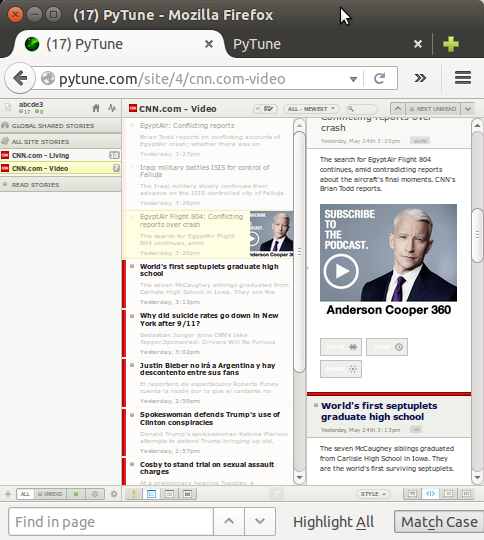
Here is a sample picture after a user logged in:
Before we deploy the app to production, we may want to run it on local using Apache and mod_wsgi.
The configuration (/etc/apache2/sites-available/pytune.com.conf) looks like this:
<VirtualHost *:80>
    ServerAdmin webmaster@pytune.com
    ServerName www.pytune.com
    ServerAlias pytune.com
    ErrorLog /var/www/pytune.com/logs/error.log
    CustomLog /var/www/pytune.com/logs/access.log combined

    #Alias /static/ /var/www/django/pytune3/media/
    Alias /media/ /var/www/django/pytune3/media/

    <Directory /var/www/django/pytune3/media>
        Require all granted
    </Directory>
    <Directory /var/www/django/pytune3>
        <Files wsgi.py>
            Require all granted
        </Files>
    </Directory>

    WSGIDaemonProcess pytune3 python-path=/var/www/django/pytune3:/var/www/django/pytune3/venv/lib/python2.7/site-packages:/var/www/django/pytune3/vendor
    WSGIProcessGroup pytune3
    WSGIScriptAlias / /var/www/django/pytune3/wsgi.py

</VirtualHost>

WSGIPythonPath /var/www/django/pytune3
We may also want to set up local domain (/etc/hosts):
127.0.0.1 pytune.com
To run the app successfully, we need to setup a couple of thing in our settings.py/local_settings.py:
- SESSION_COOKIE_DOMAIN:
PYTUNE_URL            = 'pytune.com'
SESSION_COOKIE_DOMAIN = '.pytune.com'
- SITE_ID
SITE_ID = 1
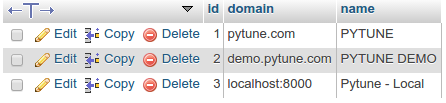
Here is the pytunedb/django_site table:
The code used for this pytune app is based on NewsBlur.
The actual updated source code is available from PyTune.git.
We may want to visit to how we can run the app on Nginx with uWSGI from pytune.com - Local dev with Nginx and uWSGI.
Ph.D. / Golden Gate Ave, San Francisco / Seoul National Univ / Carnegie Mellon / UC Berkeley / DevOps / Deep Learning / Visualization