Image Segmentation by Foreground Extraction using GrabCut Algorithm based on Graph Cuts
The syntax for grabCut() is:
cv2.grabCut(img, mask, rect, bgdModel, fgdModel, iterCount[, mode])
Here are the descriptions on the parameters (Miscellaneous Image Transformations):
- img : Input 8-bit 3-channel image.
- mask :
Input/output 8-bit single-channel mask. The mask is initialized by the function when mode is set to GC_INIT_WITH_RECT. Its elements may have one of following values:
- GC_BGD defines an obvious background pixels.
- GC_FGD defines an obvious foreground (object) pixel.
- GC_PR_BGD defines a possible background pixel.
- GC_PR_FGD defines a possible foreground pixel.
- rect : ROI containing a segmented object. The pixels outside of the ROI are marked as obvious background. The parameter is only used when mode==GC_INIT_WITH_RECT .
- bgdModel : Temporary array for the background model. Do not modify it while you are processing the same image.
- fgdModel : Temporary arrays for the foreground model. Do not modify it while you are processing the same image.
- iterCount : Number of iterations the algorithm should make before returning the result. Note that the result can be refined with further calls with mode==GC_INIT_WITH_MASK or mode==GC_EVAL .
- mode :
Operation mode that could be one of the following:
- GC_INIT_WITH_RECT The function initializes the state and the mask using the provided rectangle. After that it runs iterCount iterations of the algorithm.
- GC_INIT_WITH_MASK The function initializes the state using the provided mask. Note that GC_INIT_WITH_RECT and GC_INIT_WITH_MASK can be combined. Then, all the pixels outside of the ROI are automatically initialized with GC_BGD .
- GC_EVAL The value means that the algorithm should just resume.
We create a mask image similar to the loaded image:
mask = np.zeros(img.shape[:2],np.uint8)
Then, we create fgdModel and bgdModel. Then, we run the grabcut algorithm for 5 iterations with cv2.GC_INIT_WITH_RECT mode since we are using rectangle. It modifies the mask image:
cv2.grabCut(img,mask,rect,bgdModel,fgdModel,5,cv2.GC_INIT_WITH_RECT)
In this new mask image, pixels will be marked with four flags denoting background/foreground as specified above. So we modify the mask such that all 0-pixels and 2-pixels are put to 0 (ie background) and all 1-pixels and 3-pixels are put to 1(ie foreground pixels):
mask2 = np.where((mask==2)|(mask==0),0,1).astype('uint8')
Now our final mask is ready, and we can just multiply it with input image to get the segmented image:
img_cut = img*mask2[:,:,np.newaxis]
import numpy as np
import cv2
from matplotlib import pyplot as plt
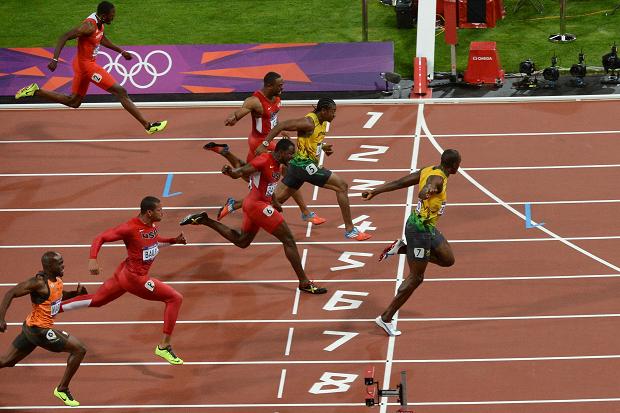
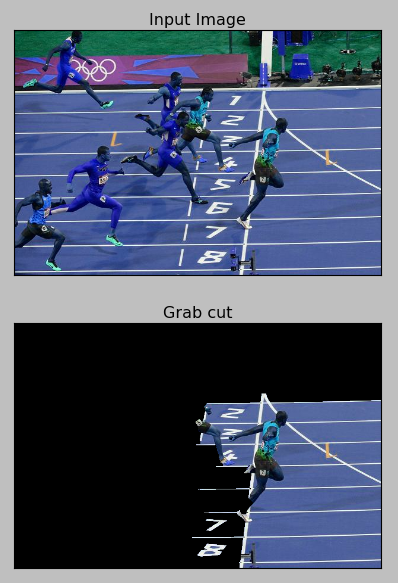
img = cv2.imread('bolt.jpg') # img.shape : (413, 620, 3)
mask = np.zeros(img.shape[:2],np.uint8) # img.shape[:2] = (413, 620)
bgdModel = np.zeros((1,65),np.float64)
fgdModel = np.zeros((1,65),np.float64)
rect = (300,120,470,350)
# this modifies mask
cv2.grabCut(img,mask,rect,bgdModel,fgdModel,5,cv2.GC_INIT_WITH_RECT)
# If mask==2 or mask== 1, mask2 get 0, other wise it gets 1 as 'uint8' type.
mask2 = np.where((mask==2)|(mask==0),0,1).astype('uint8')
# adding additional dimension for rgb to the mask, by default it gets 1
# multiply it with input image to get the segmented image
img_cut = img*mask2[:,:,np.newaxis]
plt.subplot(211),plt.imshow(img)
plt.title('Input Image'), plt.xticks([]), plt.yticks([])
plt.subplot(212),plt.imshow(img_cut)
plt.title('Grab cut'), plt.xticks([]), plt.yticks([])
plt.show()
Though the result was not satisfactory but I'll stop here and may be comeback later with a better solution. In the OpenCV's official tutorial (Interactive Foreground Extraction using GrabCut Algorithm), additional manual touch was needed to make it work.
OpenCV 3 Tutorial
image & video processing
Installing on Ubuntu 13
Mat(rix) object (Image Container)
Creating Mat objects
The core : Image - load, convert, and save
Smoothing Filters A - Average, Gaussian
Smoothing Filters B - Median, Bilateral
OpenCV 3 image and video processing with Python
OpenCV 3 with Python
Image - OpenCV BGR : Matplotlib RGB
Basic image operations - pixel access
iPython - Signal Processing with NumPy
Signal Processing with NumPy I - FFT and DFT for sine, square waves, unitpulse, and random signal
Signal Processing with NumPy II - Image Fourier Transform : FFT & DFT
Inverse Fourier Transform of an Image with low pass filter: cv2.idft()
Image Histogram
Video Capture and Switching colorspaces - RGB / HSV
Adaptive Thresholding - Otsu's clustering-based image thresholding
Edge Detection - Sobel and Laplacian Kernels
Canny Edge Detection
Hough Transform - Circles
Watershed Algorithm : Marker-based Segmentation I
Watershed Algorithm : Marker-based Segmentation II
Image noise reduction : Non-local Means denoising algorithm
Image object detection : Face detection using Haar Cascade Classifiers
Image segmentation - Foreground extraction Grabcut algorithm based on graph cuts
Image Reconstruction - Inpainting (Interpolation) - Fast Marching Methods
Video : Mean shift object tracking
Machine Learning : Clustering - K-Means clustering I
Machine Learning : Clustering - K-Means clustering II
Machine Learning : Classification - k-nearest neighbors (k-NN) algorithm
Ph.D. / Golden Gate Ave, San Francisco / Seoul National Univ / Carnegie Mellon / UC Berkeley / DevOps / Deep Learning / Visualization