Android 4.x
1. Introduction

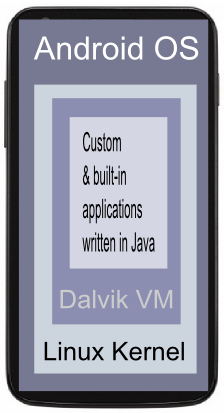
Android is an operating system based on Linux with a Java programming interface, targeted at mobile hardware such as phones and tablet computers. It seems that it keeps increasing market share in smartphone and even trying to get footing into TV world (Google TV with Android OS).
It provides tools, e.g. a compiler, debugger and a device emulator as well as its own Java Virtual machine (Dalvik). Android is created by the Open Handset Alliance which is lead by Google.
Android uses a special Java virtual machine (Dalvik) which is based on the Apache Harmony Java implementation. Dalvik uses special bytecode there you cannot run standard Java program on Android but you have to use the Android compiler to create this special byte-code.
Android supports 2-D and 3-D graphics using the OpenGL libraries and supports data storage in a SQLite database.
For development Google provides the Android Development Tools (ADT) for Eclipse to develop Android applications.
Android's Linux kernel-based OS doesn't come with a sophisticated shell environment, but because the platform is open, we can write and install shells on a device.
Android platform releases 1 through 2 are aimed primarily at smartphone devices, whereas Android release 3 will be the first operating platform specifically designed with high-end support for tablet computers.
The API level targeted by our application is important for device compatibility and the software development.
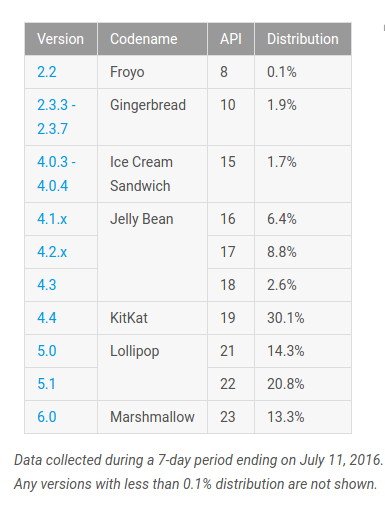
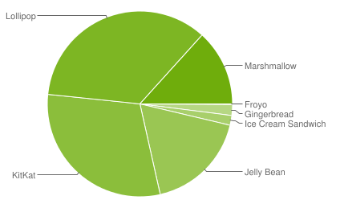
From http://developer.android.com/resources/dashboard/platform-versions.html
-
JDK (version 6 or 7 required).
We should have a recent version of the Java SDK (JDK) installed on our system.
To see what compatible version of the JDK is installed, do a quick check on the command line as below:$ java -version java version "1.7.0_21" Java(TM) SE Runtime Environment (build 1.7.0_21-b11) Java HotSpot(TM) 64-Bit Server VM (build 23.21-b01, mixed mode) $ javac -version javac 1.7.0_21
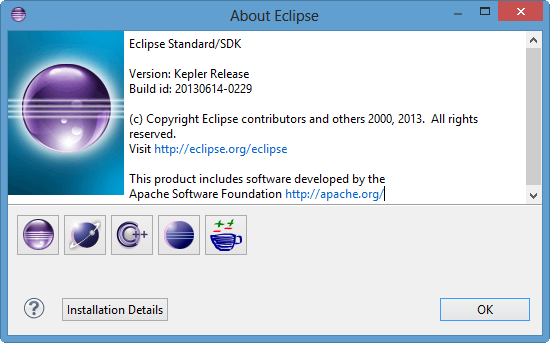
Now, Java platform is ready to go. - Eclipse IDE for Java Developers (Eclipse Kepler (4.3) Packages).
- Android SDK
- The Android Software Development Kit (SDK) has the tools to create, compile and package Android application.
- It also provides an Android device emulator. We can create Android virtual devices (AVD) via the Android SDK, which run in this emulator.
- It contains the Android debug bridge (adb) tool which allows to connect to an virtual or real Android device.
Get Android Development Tools (ADT) from ADT Bundle
 .
.
The ADT Bundle includes everything you need to begin developing apps:
- Eclipse + ADT plugin
- Android SDK Tools
- Android Platform-tools
- The latest Android platform
- The latest Android system image for the emulato
In Eclipse, open the Preferences dialog via Windows -> Preferences.
For emulation, we need to define a device.
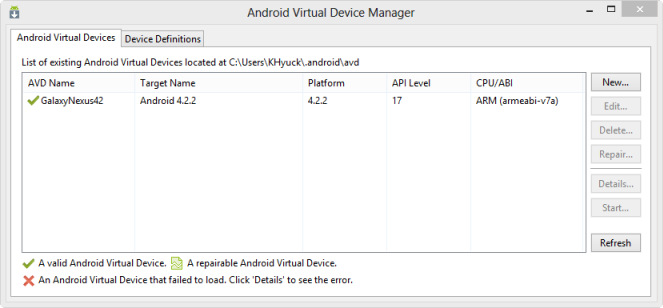
Select Window -> Android AVD Manager from the menu.
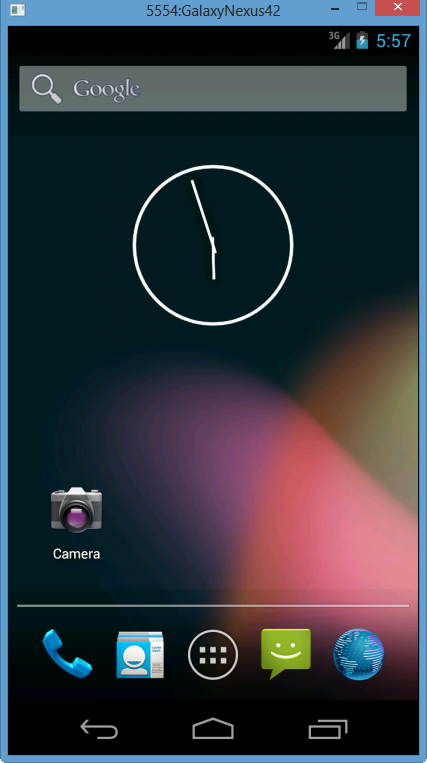
Run our code provided by default, we get:
Android SDK Development Tool Commands
| Android SDK Development Tool | Linux/Mac OS X | Windows |
|---|---|---|
| Android SDK and AVD Manager | android | android.bat |
| Dalvik Debug Monitor | ddms | ddms.bat |
- Open the import Dialog
Select File > Import ... to open the import dialog. - Import the "MyProject" project
In the import dialog, expand the General node and select Existing Projects into Workspace, then click Next to move to the Import Projects step. Make sure that Select root directory is selected, then click the Browse... button.
In the Browse For Folder dialog, locate the "MyProject" folder, select it and click OK. Then, click Finish to import the project. The project now shows up in the Package Explorer. - Launch the "MyProject" project
Right click the "MyProject" in the Package Explorer window, and then select Run As > Android Application from the menu.
When we have the following line of code from the imported package, depending on the compliance level, we may get error message from Eclipse:
      @Override
      public void onClick(DialogInterface dialog, int button)
      {
In my case, I got:
Android requires compiler compliance level 5.0 or 6.0. Found '1.7' instead.
since I'm using Java 1.7. In this case, we need to set the compliance level to 1.6 because 1.5 won't work with the @Override annotation. Right click on the Project -> Properties, then select Java Compiler, the set it 1.6 as in the picture below.

At Apply, we get:
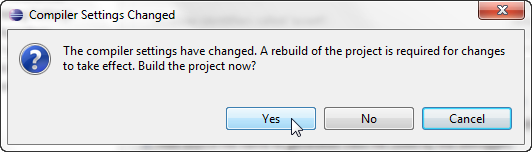
Hit "Yes", and that's it.
Here is the project-wise solution. Right click the "MyProject" in the Package Explorer window, and then select Delete from the menu. In the dialog that appears, ensure that Delete project contents on disk is not selected if we want to use the project's folders in workspace. If not, we can check it before be click OK.
Ph.D. / Golden Gate Ave, San Francisco / Seoul National Univ / Carnegie Mellon / UC Berkeley / DevOps / Deep Learning / Visualization