Win32 API
- Win32 API - Introduction
- Win32 API - C Run Time Libraries
- Calling Conventions
- Win32 API - DLL
- Win32 API - MFC
- Kernel Objects, Handles, and Synchronization
The Microsoft Foundation Class (MFC) Library provides an object-oriented wrapper over much of the Win32 and COM APIs. Although it can be used to create very simple desktop applications, it is most useful when we need to develop more complex user interfaces with multiple controls. We can use MFC 11.0 to create applications with Office-style user interfaces.
MSDN provides hierarchy charts included with each class, here.
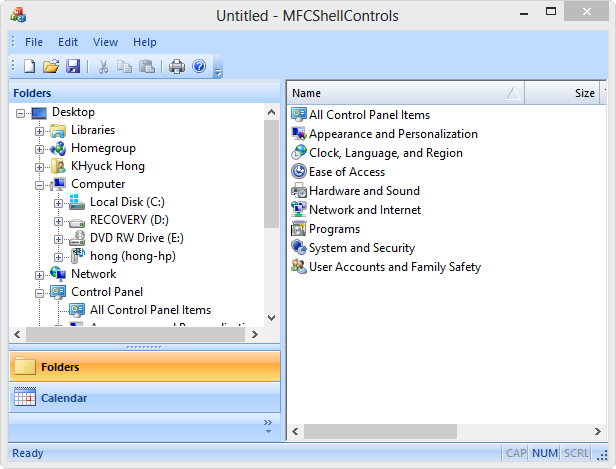
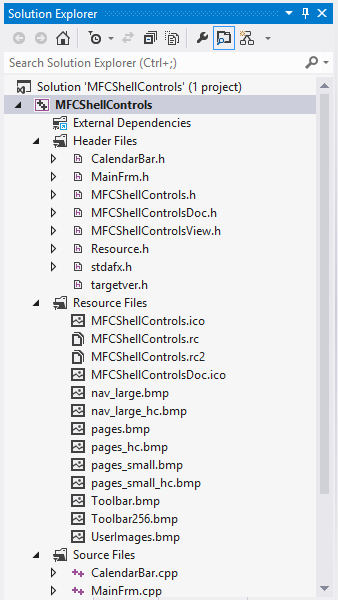
We will create an application that resembles File Explorer. We will create a window that contains two panes. The left pane will contain a CMFCShellTreeCtrl object that displays our Desktop in a hierarchical view. The right pane will contain a CMFCShellListCtrl that shows the files in the folder that is selected in the left pane.
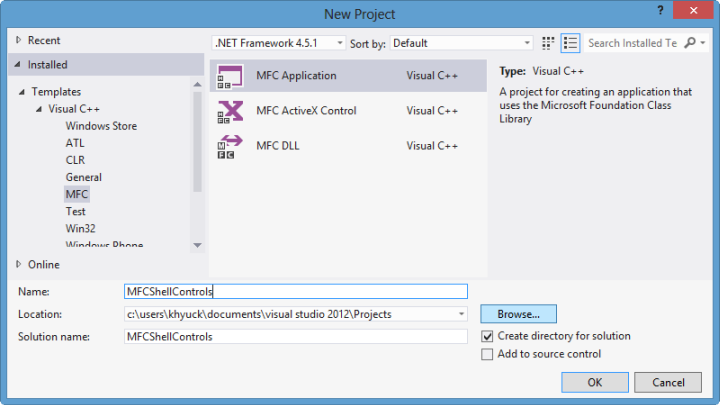
- Use the MFC Application Wizard to create a new MFC application. To run the wizard, from the File menu select New, and then select Project. The New Project dialog box will be displayed.
- In the New Project dialog box, expand the Visual C++ node in the Project types pane and select MFC. Then, in the Templates pane, select MFC Application. Type a name for the project, such as MFCShellControls and click OK.
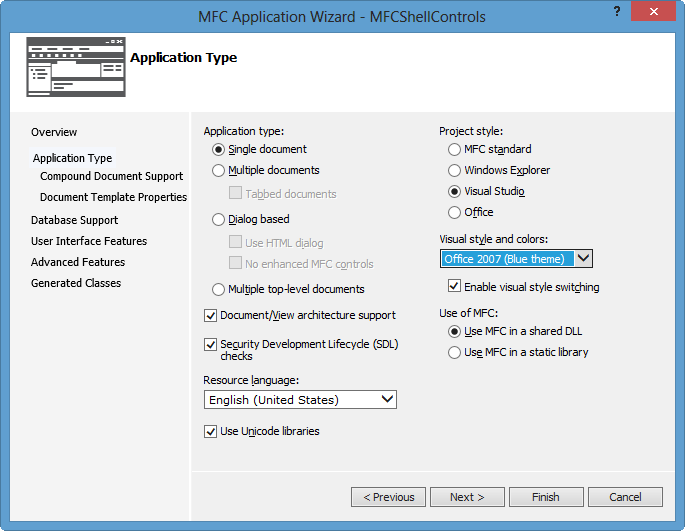
The MFC Application Wizard will be displayed. - In the MFC Application Wizard dialog box, click Next. The Application Type pane will be displayed.
- On the Application Type pane, under Application type, clear the Tabbed documents option. Next, select Single document and select Document/View architecture support. Under Project style, select Visual Studio, and from the Visual style and colors drop down list select Office 2007 (Blue theme). Leave all other options as they are.
Click Next to display the Compound Document Support pane. - On the Compound Document Support pane, select None. Click Next to display the Document Template Strings pane.
- Do not make any changes to the Document Template Strings pane. Click Next to display the Database Support pane.
- On the Database Support pane, select None because this application does not use a database. Click Next to display the User Interface Features pane.
- On the User Interface Features pane, make sure that the Use a menu bar and toolbar option is selected. Leave all other options as they are. Click Next to display the Advanced Features pane.
- On the Advanced Features pane, under Advanced features, select only ActiveX controls and Common Control Manifest. Under Advanced frame panes, select only the Navigation pane option. This will cause the wizard to create the pane to the left of the window with a CMFCShellTreeCtrl already embedded.
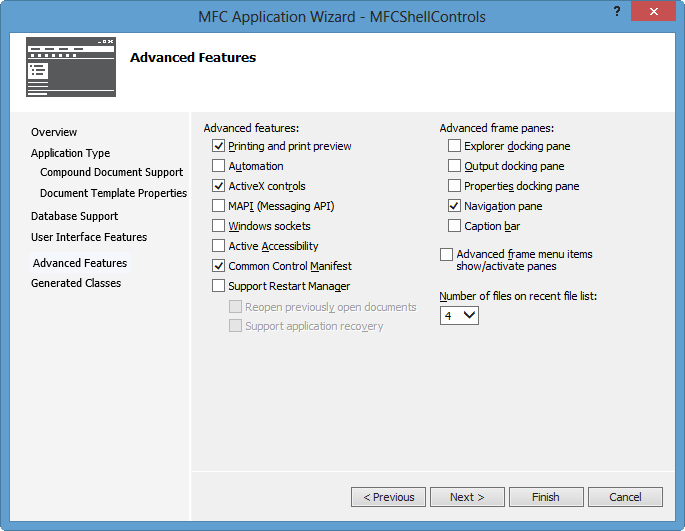
Click Next to display the Generated Classes pane. - We are not going to make any changes to the Generated Classes pane. Therefore, click Finish to create our new MFC project.
- Verify that the application was created successfully by building and running it. To build the application, from the Build menu select Build Solution.
1>------ Build started: Project: MFCShellControls, Configuration: Debug Win32 ------
1>  stdafx.cpp
1>  MFCShellControlsView.cpp
1>  MFCShellControlsDoc.cpp
1>  MFCShellControls.cpp
1>  MainFrm.cpp
1>  CalendarBar.cpp
1>  Generating Code...
1>  MFCShellControls.vcxproj -> c:\users\khyuck\documents\visual studio 2012\Projects\MFCShellControls\Debug\MFCShellControls.exe
========== Build: 1 succeeded, 0 failed, 0 up-to-date, 0 skipped ==========
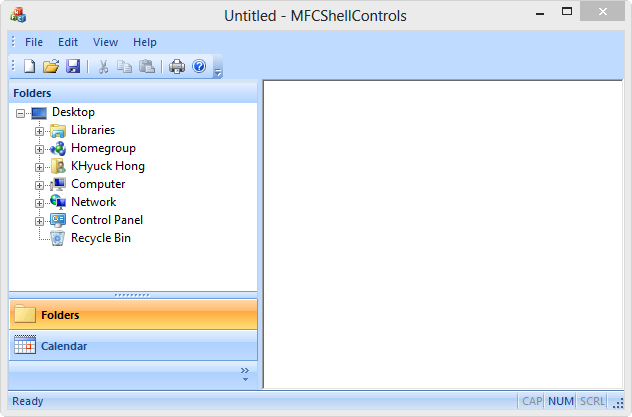
If the application builds successfully, run the application by selecting Start Debugging from the Debug menu. - The wizard automatically creates an application that has a standard menu bar, a standard toolbar, a standard status bar, and an Outlook bar to the left of the window with a Folders view and a Calendar view.
In this section, we will add an instance of CMFCShellListCtrl to the view that the wizard created. Open the view header file by double-clicking MFCShellControlsView.h in the Solution Explorer.
Locate the #pragma once directive near the top of the header file. Immediately underneath it add this code to include the header file for CMFCShellListCtrl:
#include <afxShellListCtrl.h>
Now add a member variable of type CMFCShellListCtrl. First, locate the following comment in the header file:// Generated message map functions
Immediately above that comment add this code:private: CMFCShellListCtrl m_wndList;-
The MFC Application Wizard already created a CMFCShellListCtrl object in the CMainFrame class, but it is a protected member. We will access this object later. Therefore, create an accessor for it now. Open the MainFrm.h header file by double-clicking it in the Solution Explorer. Locate the following comment:
// Attributes
Immediately under it, add the following method declaration:public: CMFCShellTreeCtrl& GetShellTreeCtrl();Next, open the MainFrm.cpp source file by double-clicking it in the Solution Explorer. At the bottom of that file, add the following method definition:CMFCShellTreeCtrl& CMainFrame::GetShellTreeCtrl() { return m_wndTree; } -
Now we update the CMFCShellControlsView class to handle the WM_CREATE windows message. Open the MFCShellControlsView.h header file and click on this line of code:
class CMFCShellControlsView : public CView
Next, in the Properties window, click the Messages icon.
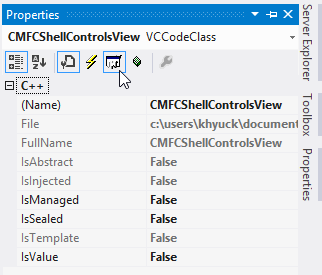
Scroll down until we find the WM_CREATE message. From the drop down list next to WM_CREATE, select <Add> OnCreate. This creates a message handler for us and automatically updates the MFC message map. In the OnCreate method we will now create our CMFCShellListCtrl object. Find the OnCreate method definition in the MFCShellControlsView.cpp source file, and replace its implementation with the following code:int CMFCShellControlsView::OnCreate(LPCREATESTRUCT lpCreateStruct) { if (CView::OnCreate(lpCreateStruct) == -1) return -1; CRect rectDummy (0, 0, 0, 0); m_wndList.Create(WS_CHILD | WS_VISIBLE | LVS_REPORT, rectDummy, this, 1); return 0; } -
Repeat the previous step but for the WM_SIZE message. This will cause our applications view to be redrawn whenever a user changes the size of the application window. Replace the definition for the OnSize method with the following code:
void CMFCShellControlsView::OnSize(UINT nType, int cx, int cy) { CView::OnSize(nType, cx, cy); m_wndList.SetWindowPos(NULL, -1, -1, cx, cy, SWP_NOMOVE | SWP_NOZORDER | SWP_NOACTIVATE); } -
The last step is to connect the CMFCShellTreeCtrl and CMFCShellListCtrl objects by using the CMFCShellTreeCtrl::SetRelatedList method. After we call this method, the CMFCShellListCtrl will automatically display the contents of the item selected in the CMFCShellTreeCtrl. We will do this in the OnActivateView method, which is overridden from CView::OnActivateView.
In the MFCShellControlsView.h header file, inside the CMFCShellControlsView class declaration, add the following method declaration:
protected:
    virtual void OnActivateView(BOOL bActivate,
        CView* pActivateView,
        CView* pDeactiveView);
Next, add the definition for this method to the MFCShellControlsView.cpp source file:void CMFCShellControlsView::OnActivateView(BOOL bActivate, CView* pActivateView, CView* pDeactiveView) { if (bActivate && AfxGetMainWnd() != NULL) { ((CMainFrame*)AfxGetMainWnd())->GetShellTreeCtrl().SetRelatedList(&m_wndList); } CView::OnActivateView(bActivate, pActivateView, pDeactiveView); }Because we are calling methods from the CMainFrame class, we must add an #include directive at the top of the MFCShellControlsView.cpp source file just the #include "stdafx.h":#include "MainFrm.h"
-
Verify that the application was created successfully by building and running it. To build the application, from the Build menu select Build Solution. If the application builds successfully,
1>------ Build started: Project: MFCShellControls, Configuration: Debug Win32 ------
1>  MFCShellControlsView.cpp
1>  MFCShellControls.vcxproj -> c:\users\khyuck\documents\visual studio 2012\Projects\MFCShellControls\Debug\MFCShellControls.exe
========== Build: 1 succeeded, 0 failed, 0 up-to-date, 0 skipped ==========
run it by selecting Start Debugging from the Debug menu.We should now see the details for the item selected in the CMFCShellTreeCtrl in the view pane. When we click a node in the CMFCShellTreeCtrl, the CMFCShellListCtrl will be automatically updated. Likewise, if we double-click a folder in the CMFCShellListCtrl, the CMFCShellTreeCtrl should be automatically updated. Right click any item in the tree control or in the list control. Note that we get the same context menu as if we were using the real File Explorer.