Chapter 1. Xcode Setup and Interface Builder
I listed what do we need to develop iPhone Applications and a brief introduction to Xcode focused on using Objective-C from Command Line Utility in iPhone and iPad Application.
Now it's time to look into what features Xcode provides us through SDK. I am using Xcode Version 3.2.2 with Mac OS X 10.6.3

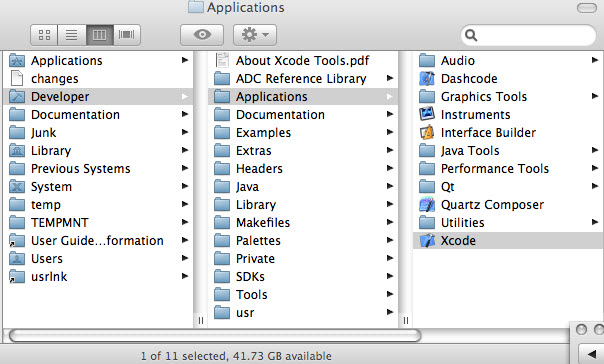
Xocde is located in Developer/Applications folder.
Launch Xcode and you will get a welcome screen.
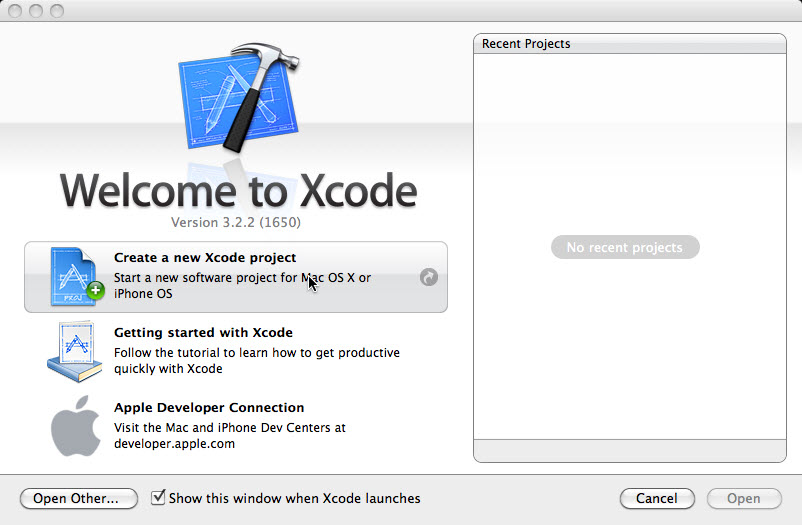
Select "Create a new Xcode Proejct".
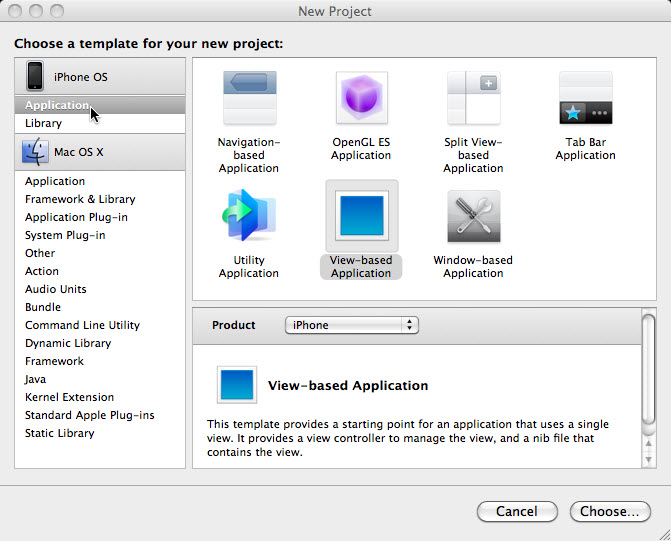
Note that we are already on Application of iPhone OS. Press "Choose...".
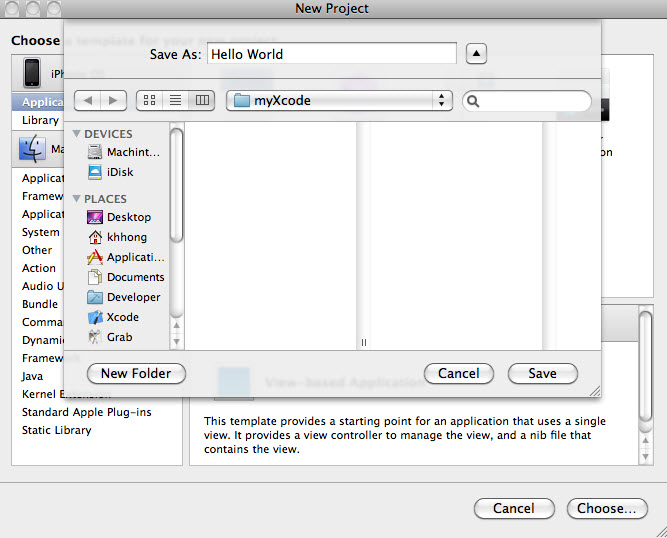
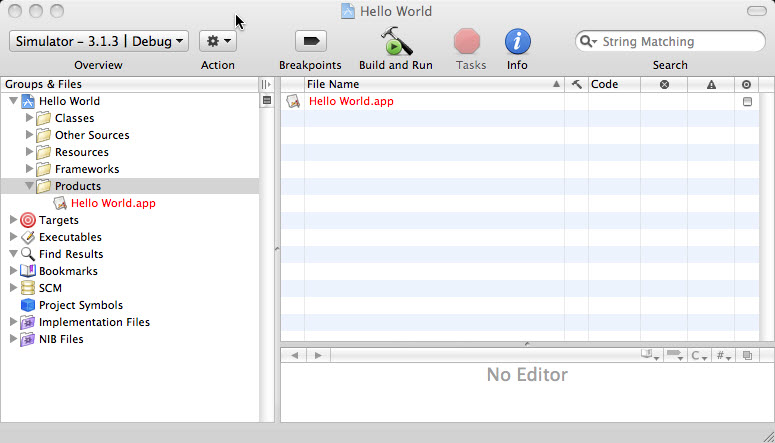
Type in Project Name and click Save. Then you will have a Project window as in the picture below.
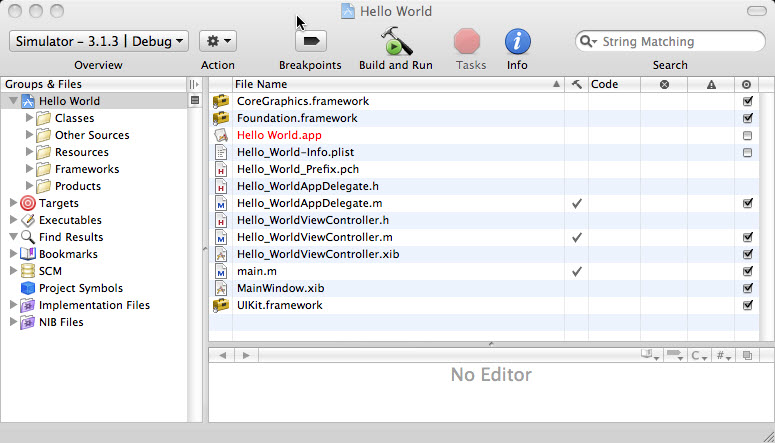
Let's look at the Groups & Files pane which in left side of the window. Under Hello World, we have five subfolders: Classes, Other Sources, Frameworks, and Products.
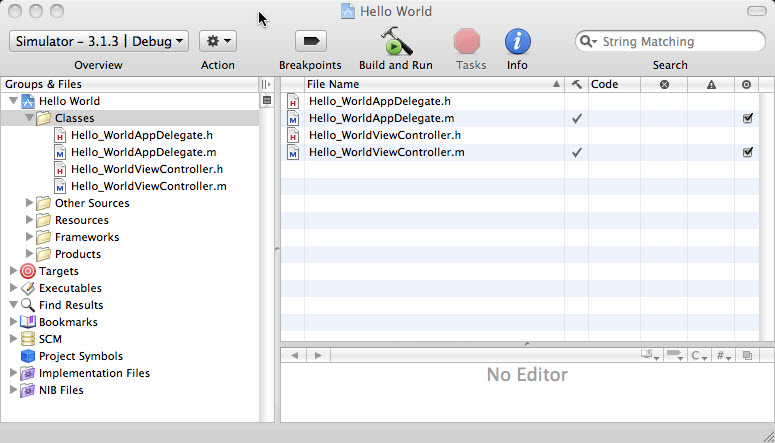
- Classes
Classes is where most of the code will go. This is where all Objective-C classes belong.
- Other Sources
This contains source code files other than Objective-C classes. When you create a new iPhone Hello World project, there are two files in this folder.
- Hello_World_Prefix.pch
The extension ".pch" stands for "precompiled header". This is a list of header files from frameworks that are used by our project. Xcode will precompile the headers contained in this file, which will reduce the time to compile your project whenever you select "Build" or "Build and Go" - main.m
This is where your application's main() method is. You normally won't need to edit or change this file.

- Hello_World_Prefix.pch
- Resources
This contains non-code files that will be included as part of your application. This is where you will include files such as images, sound files, movie files, text files, or property lists that your program may need while it is running. Since your application runs in its own sandbox, you will have to include any files you need here, because you won't be able to access files located elsewhere on the iPhone except through sanctioned APIs, such as the ones that provide access to the iPhone's photo library and address book. We have three items in this folder:
- Hello_WorldViewController.xib
This file contains information from Interface Builder. - MainWindow.xib
This is your application's main Interface Builder file. - Hello_World-info.plist
This is a property list.
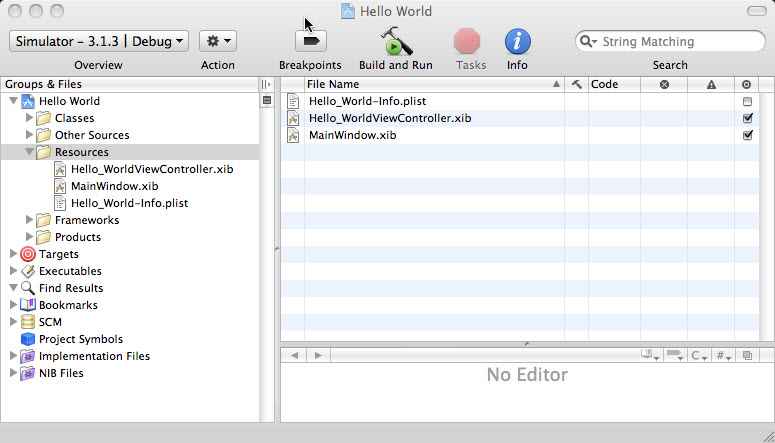
- Hello_WorldViewController.xib
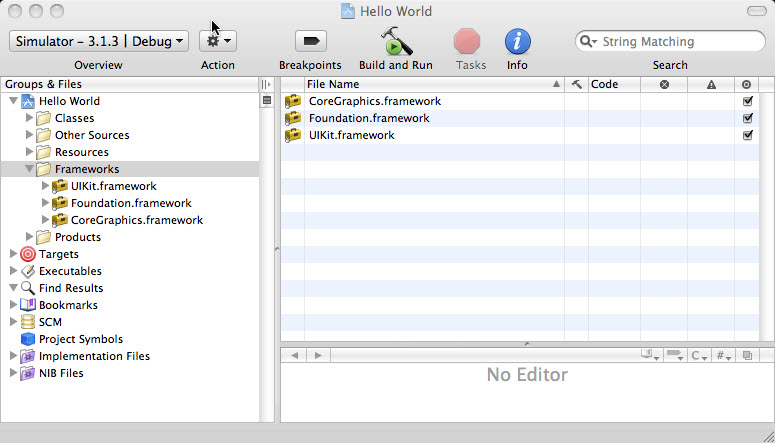
- Frameworks
This can contain code as well as resources such as image and sound files. Any framework or library that you add to this folder will be linked in to your application. The most commonly needed frameworks and libraries are linked in to our project by default. So, most of the time, we will not need to do anything with this folder.
- Products
This contains the application that this project produces when it is compiled. If you expand Products, you will see an item called "Hello World.app". This is the application that this particular project creates. "Hello World.app" is this project's only product. But, it is listed in red, which means that the file cannot be found. This makes sense, because we haven't compiled our project yet.
Now it's time to look at the "Interface Builder(IB)".
Expand the "Resources" in "Group & Files" list, and then double click the file "Hello_WorldViewController.xib". It will open up "Interface Builder".
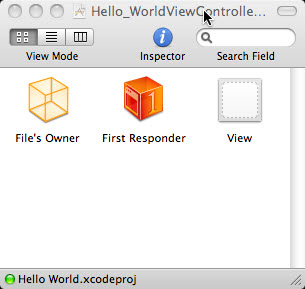
The "Hello_WorldViewController.xib" window is the Interface Builder's main window. Every icon in this window is a single instance of an Objective-C class that will be created automatically for you when this nib file is loaded. But there are exceptions: the first two icons ("File's Owner" and "First Responder").
Interface Builder has a long history. It's been there since 1988 and used to develop applications for NextSTEP, OpenSTEP, Mac OS X, and now iPhone. Interface Builder supports two files: an older format that uses the extension ".nib" and a newer format ".xib". The iPhone project templates all use ".xib" files by default, but until very recently, all Interface Builder files had the ".nib" extension, and as a result, most developers call Interface Builder files as "nib files". Interface Builder files are commonly called "nib files" regardless of whether it is ".xib" or ".nib". Actually, Apple uses "nib" and "nib file" throughout its documentation.
Every nib file starts off with the same two icons, "File Owner" and "First Responder". They are created automatically and can't be deleted.
-
File's Owner
This will always be the first icon in any nib file and represents the object that loaded the nib file from disk. This is the object that owns this copy of the nib file. -
First Responder
This is the object with which the user is currently interacting. - Other icons
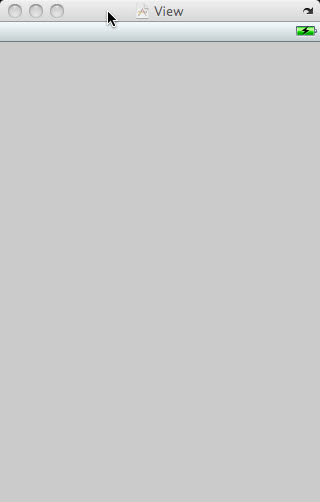
Every other icon in this window, other than these first two special cases, represents an object instance that will be created when the nib file loads. For example, the third icon called "View". This View icon represents an instance of the UIView class. A UIView object is an area that a user can see and interact with. In our application, we will have only one view, so this icon represents everything that the user can see. This View window is where you can put your graphical interface.
The window shown below is the library. This is where you will find all the stock Cocoa Touch objects that Interface Builder supports.
Dragging an item from the library to a nib file window will add an instance of that class to your application. You can open it at any time from Interface Builder->Tools->Library. The items on this palette are primarily from the iPhone UIKit, which is a framework of objects used to create an application's UI.
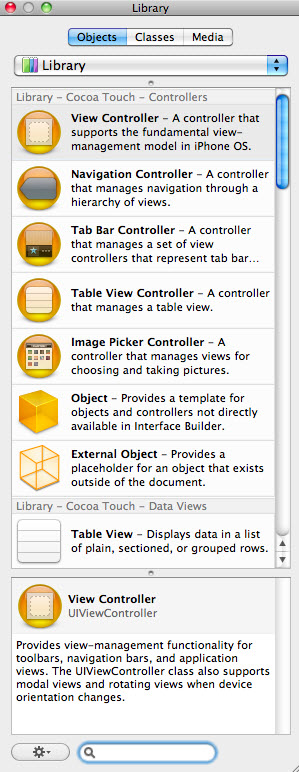
Scroll down the list of objects until you find "Label" as in the picture below.
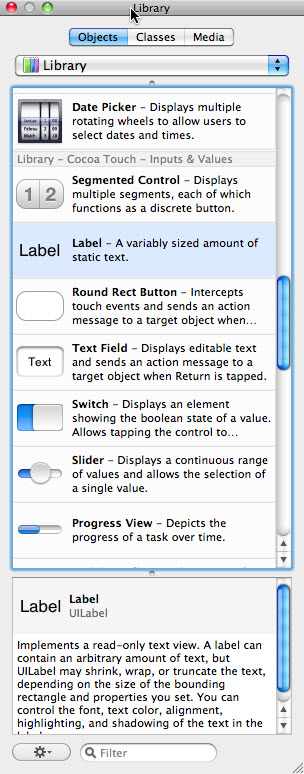
Drag a label from the library to the View window.
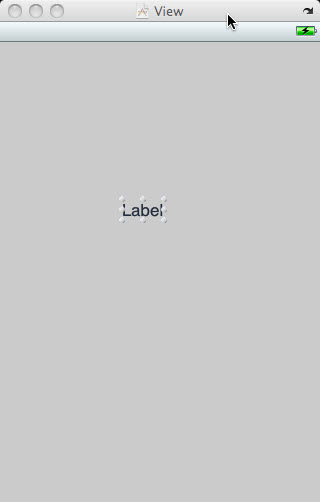
This will add an instance of UILabel as a subview of our application's main view. Change the Label to "Hello World" after double click the label. Then we save it. Select File->Save on Interface Builder.
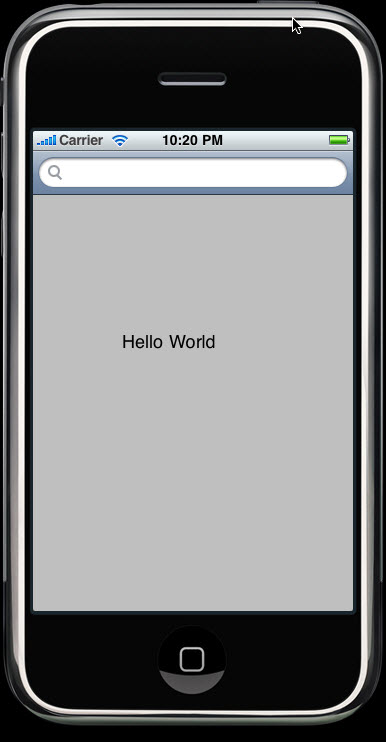
Then, in Xcode, select Build->Build and Run. Xcode will launch our application in the iPhone simulator after compiling it.
Notice that we did not write any code. But what if we want to change something like size of text or the text color?
Let's go back to Interface Builder. Select the label on the View window and then Tools->Inspector. Then we will have a window called Inspector.

As we can see from the title of the Inspector window which is Label Attributes, we can set the attributes of the selected item. After we made changes, we should File->Save under Interface Builder and then Build and Run in Xcode. Then you will see something like this on the simulator.
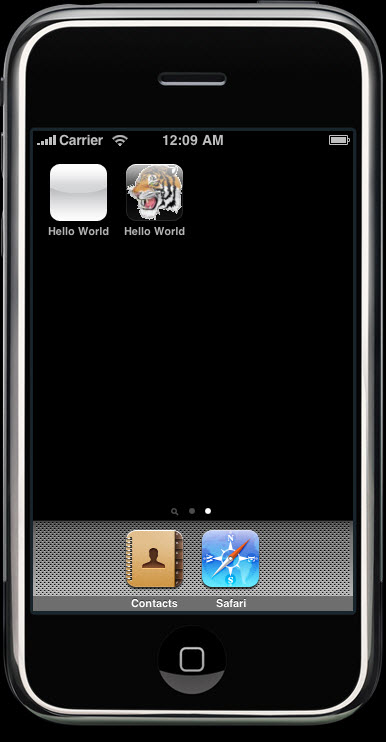
So, we made our first iPhone application.
But when we look at the icon of Hello World on the iPhone's home screen, it is dull.
Let's give it a little bit more iPhone-like icon. To do that, we need to create an icon and save it as .png format. Size should be 57x57.
Drag the icon you made to the Resource folder in Xcode. Then, Xcode will prompt you a window as below.
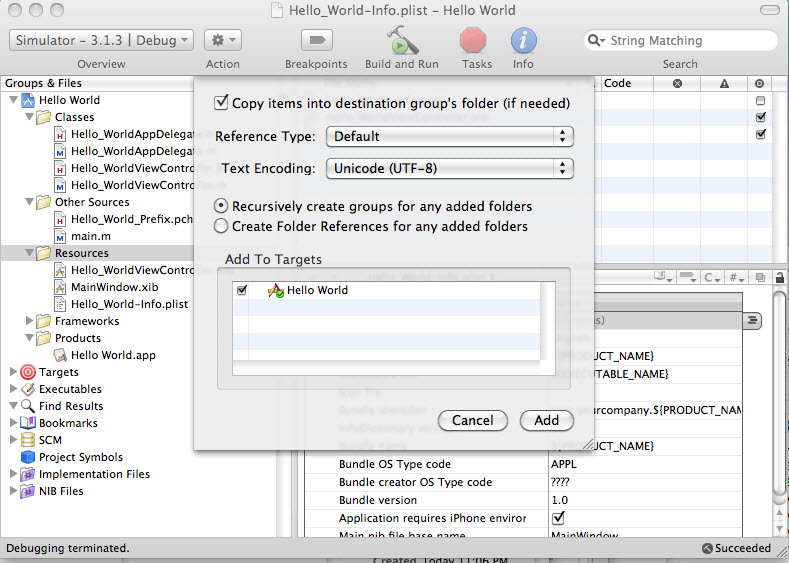
Check "Copy items into destination groups folder (if needed)", and click "Add". Then the project window has icon, "HelloWorldIcon.png", as in the picture.
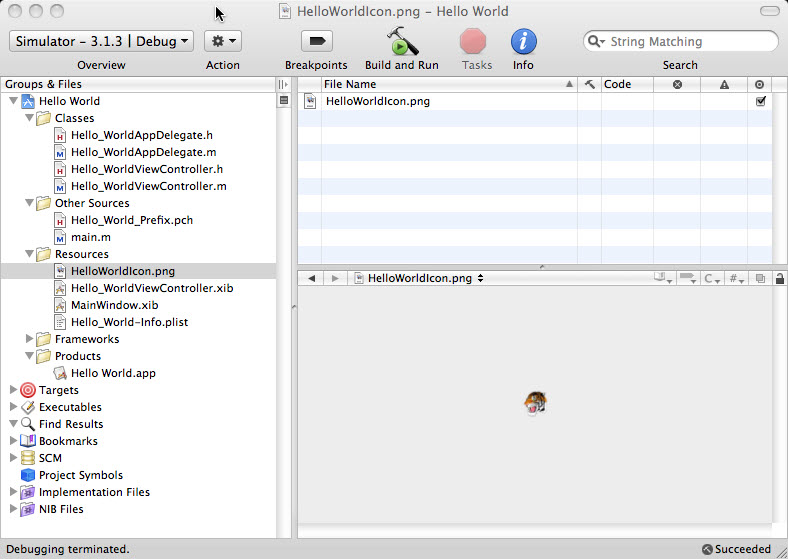
What we've done so far is put the icon image into the project, which will result in the image getting build into our application bundle. The next thing we need to do is to specify that this particular image should be used as our application's icon.
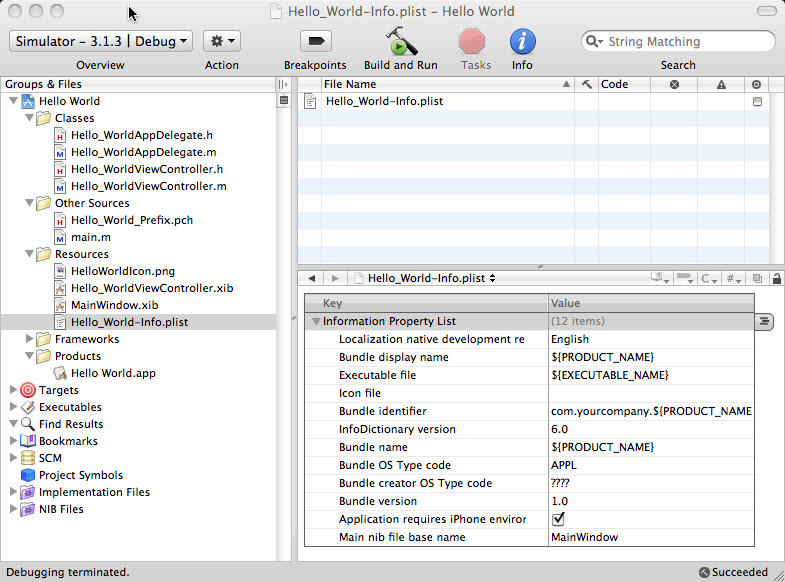
Click "Hello_World-Info.plist" file from the expanded Resource folder. This is a property list file that contains some general information about our application including the name of the icon file.
When you select the "Hello_World-Info.plist", the property list will appear in the editing pane as in the picture below.
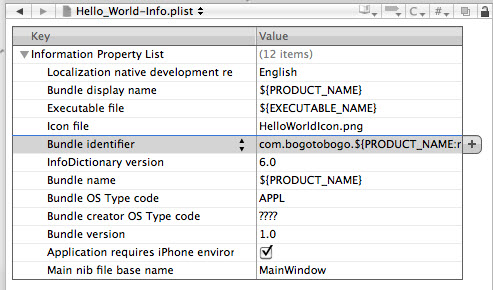
Within the property list, probably you need to change to things as shown in the picture.
- Icon File Name
- Company Name in the "Bundle Identifier" key.
Time to run it again.
As you see it, we have a new one with icon with the old one without any icon.