Chapter 4. Autorotation and Autosizing
- 4.1 Preview
- 4.2 Specifying Rotation Support
- 4.3 Interface with Autosize Attributes
- 4.4 Reconfiguring a View Programmatically When Rotated
- 4.5 View Swapping
This chapter is largely based on Beginning iPhone 3 Development
In this tutorial, we will try out three different approaches to supporting autorotation. We will learn about autosizing attributes and how to reconfigure the views with code when the phone rotates. Autorotation is specified in the view controller. Another approach is to swap between two completely different views when the phone rotates.
When the user rotates the phone, the view controller will be asked if it will allow the rotation. If the view controller says yes, the application's window and views will be rotated and get resized to fit the new orientation.
Your application's main task is making sure everything fits nicely in the new window with different size because of the rotation. Fortunately, most of the work in moving the pixels around the screen to adapt the rotation is managed by the iPhone OS.
Start a new project and call it Autosize. Before we design our view, we should tell the iPhone that our view requires support for autorotation by modifying the view controller class.
Open "AutosizeViewController.m" under Classes folder, you will see that a method called
"shouldAutorotateToInterfaceOrientation:" is already there for you. Just uncomment to make it work.
// Override to allow orientations other than the default portrait orientation.
- (BOOL)shouldAutorotateToInterfaceOrientation:(UIInterfaceOrientation)interfaceOrientation {
    // Return YES for supported orientations
    return (interfaceOrientation == UIInterfaceOrientationPortrait);
}
There are four defined orientations correspond to the four general ways that the iPhone can be held:
- UIInterfaceOrientationPortrait
- UIInterfaceOrientationPortraitUpsideDown
- UIInterfaceOrientationLandscapeLeft
- UIInterfaceOrientationLandscapeRight
When the phone is changed to a new orientation, this method is called and return either YES or NO.
In the above implementation code, UIInterfaceOrientationPortrait is set as default. If you want to rotate to any orientation, we can simply change the code to return YES for any value passed in as the code below.
- (BOOL)shouldAutorotateToInterfaceOrientation:
    (UIInterfaceOrientation)interfaceOrientation {
    return YES;
}
But in this tutorial, we want to allow other rotation modes except
UIInterfaceOrientationPortraitUpsideDown. So, the coding is:
- (BOOL)shouldAutorotateToInterfaceOrientation:
(UIInterfaceOrientation)interfaceOrientation {
    return (interfaceOrientation !=
         UIInterfaceOrientationPortraitUpsideDown);
}
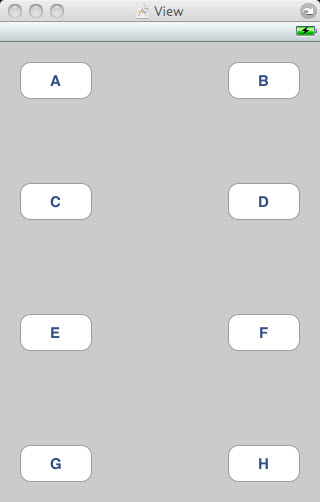
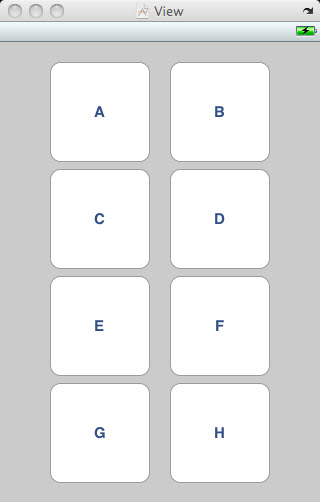
Build 8 buttons as in the picture.
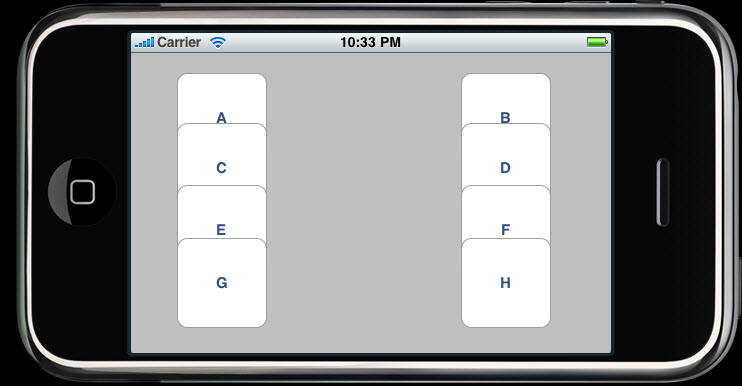
Run the simulator, select Rotate Right under Hardware from top menu.
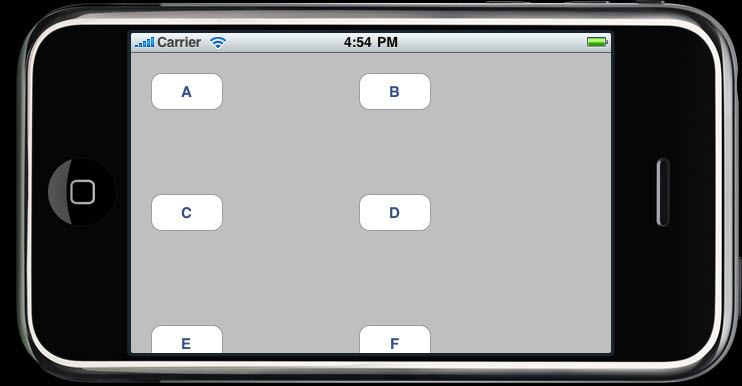
It did work, but partially.
Go back to Interface Builder. The top left button seems to be all right.
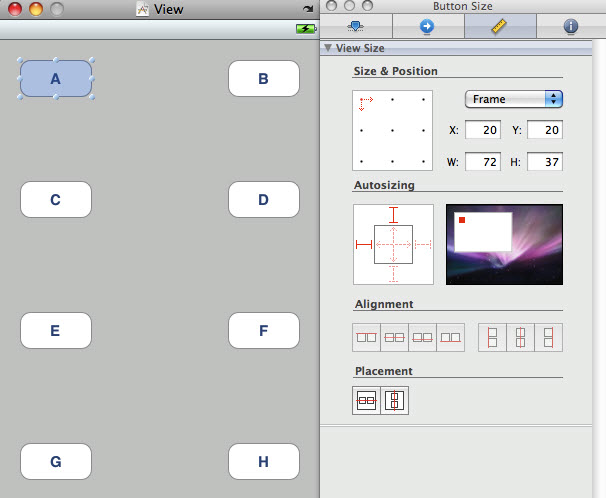
So, select the top left button, and open up size inspector under Tools menu.
The size inspector allows us to set an object's autosize attributes.
The picture below shows the size inspector when the button A has been selected. In the Autosize section of the picture, solid line indicate it's fixed while dashed line means it's flexible. For the button A, red box, stays in the same place relative to the left and top edges of the parent view as the parent view changes in size.
Look! The result of reconfiration.
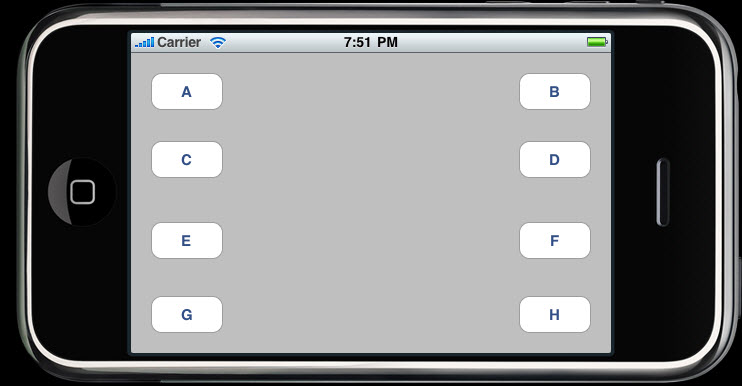
But something's not quite right. What is it? The design is not aesthetically pleasing. Too much empty spaces between buttons! Let's change the size of the buttons a little bit.
How about this?
Yes, it looks much better.
However, we have a problem after rotation. Not enoguh space.
One way we can handle this issue between spacing and sizing is to specify new positions for each of the buttons when it's rotated.
To change a control's attributes, we need an outlet that points to the object we want to change. So, we need to declare an outlet
for each of the eight buttons in order to reconfigure them.
Do not forget connecting each button from File's Owner icon, and set corresponding outlet.
Also, do not forget saving nib before you do Build and Run.
File "AutosizeViewController.h"
#import <UIKit/UIKit.h>

@interface AutosizeViewController : UIViewController {
    UIButton *button1;
    UIButton *button2;
    UIButton *button3;
    UIButton *button4;
    UIButton *button5;
    UIButton *button6;
	UIButton *button7;
    UIButton *button8;
}
@property (nonatomic, retain) IBOutlet UIView *button1;
@property (nonatomic, retain) IBOutlet UIView *button2;
@property (nonatomic, retain) IBOutlet UIView *button3;
@property (nonatomic, retain) IBOutlet UIView *button4;
@property (nonatomic, retain) IBOutlet UIView *button5;
@property (nonatomic, retain) IBOutlet UIView *button6;
@property (nonatomic, retain) IBOutlet UIView *button7;
@property (nonatomic, retain) IBOutlet UIView *button8;
@end
File "AutosizeViewController.m"
#import "AutosizeViewController.h"

@implementation AutosizeViewController
@synthesize button1;
@synthesize button2;
@synthesize button3;
@synthesize button4;
@synthesize button5;
@synthesize button6;
@synthesize button7;
@synthesize button8;

#ifdef __IPHONE_3_0
- (void)willAnimateRotationToInterfaceOrientation:
    (UIInterfaceOrientation)interfaceOrientation duration:(NSTimeInterval)duration {
#else
	- (void)willAnimateSecondHalfOfRotationFromInterfaceOrientation:
         (UIInterfaceOrientation)fromInterfaceOrientation duration:(NSTimeInterval)duration {
		UIInterfaceOrientation interfaceOrientation = self.interfaceOrientation;
#endif

		if (interfaceOrientation == UIInterfaceOrientationPortrait
			|| interfaceOrientation == UIInterfaceOrientationPortraitUpsideDown)
		{
			button1.frame = CGRectMake(50, 20, 100, 100);
			button2.frame = CGRectMake(170, 20, 100, 100);
			button3.frame = CGRectMake(50, 127, 100, 100);
			button4.frame = CGRectMake(170, 127, 100, 100);
			button5.frame = CGRectMake(50, 234, 100, 100);
			button6.frame = CGRectMake(170, 234, 100, 100);
			button7.frame = CGRectMake(50, 341, 100, 100);
			button8.frame = CGRectMake(170, 342, 100, 100);
		}
		else
		{
			button1.frame = CGRectMake(30, 46, 100, 100);
			button2.frame = CGRectMake(30, 154, 100, 100);
			button3.frame = CGRectMake(140, 46, 100, 100);
			button4.frame = CGRectMake(140, 154, 100, 100);
			button5.frame = CGRectMake(250, 46, 100, 100);
			button6.frame = CGRectMake(250, 154, 100, 100);
			button7.frame = CGRectMake(360, 46, 100, 100);
			button8.frame = CGRectMake(360, 154, 100, 100);
		}

	}

	- (BOOL)shouldAutorotateToInterfaceOrientation: (UIInterfaceOrientation)interfaceOrientation {
		return (interfaceOrientation != UIInterfaceOrientationPortraitUpsideDown);
	}

	- (void)viewDidUnload {
		// Release any retained subviews of the main view.
		// e.g. self.myOutlet = nil;
		self.button1 = nil;
		self.button2 = nil;
		self.button3 = nil;
		self.button4 = nil;
		self.button5 = nil;
		self.button6 = nil;
		self.button7 = nil;
		self.button8 = nil;
		[super viewDidUnload];
	}

	- (void)dealloc {
		[button1 release];
		[button2 release];
		[button3 release];
		[button4 release];
		[button5 release];
		[button6 release];
		[button7 release];
		[button8 release];
		[super dealloc];
	}
	@end
Go to Xcode, Build and Run.
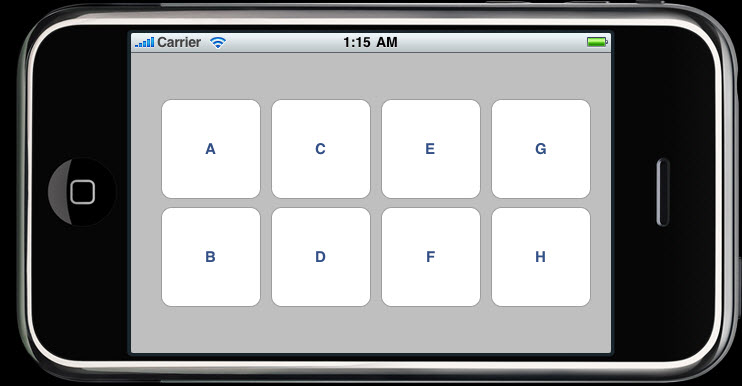
Done!
But we have a little problem for this approach.
What if we have dozens of those squares or hundreds.
Lots of coordinates inputs will be needed.
Isn't it more effective to design set of views before the rotation?
Yes, it is a different approach and we call it "View Swapping".
In this section, we will design two swap views as in the pictures below.
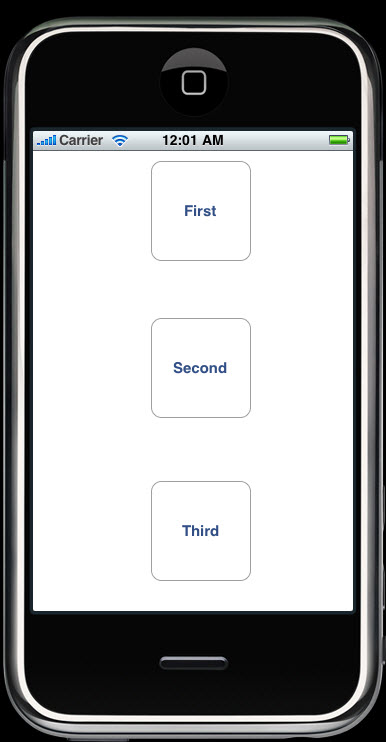
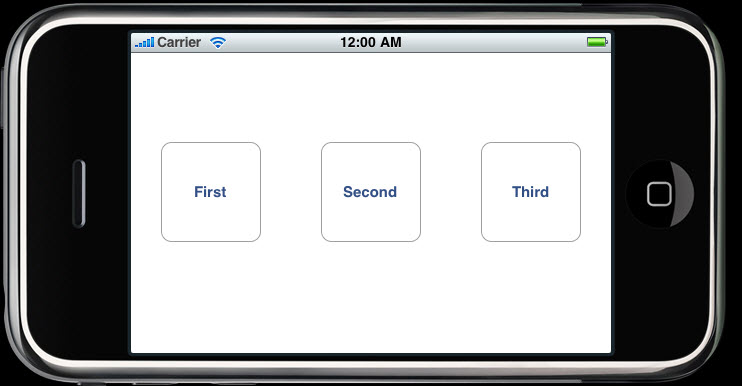
When the buttons are tapped, they will be hidden. Because we have three buttons on each view and
because an outlet can only point to one object, we need 3 buttons for portrait view and
3 buttons for landscape view.
In addition to the outlets for the buttons, we need two more outlets for the two views.
Because we are going to be changing the value of view at runtime, we should have a way to get
both views. So, we need two UIView outlets.
We will have just a single buttonPressed: action method since all the buttons are going to call the same method.
So, interface file "SwapViewController.h" is:
#import <UIKit/UIKit.h>
#define degreesToRadian(x) (M_PI * (x) / 180.0)

@interface SwapViewController : UIViewController {
    UIView    *landscape;
    UIView    *portrait;

    // First
    UIButton *landscapeFirstButton;
    UIButton *portraitFirstButton;

    // Second
    UIButton *landscapeSecondButton;
    UIButton *portraitSecondButton;

    // Third
    UIButton *landscapeThirdButton;
    UIButton *portraitThirdButton;
}

@property (nonatomic, retain) IBOutlet UIView *landscape;
@property (nonatomic, retain) IBOutlet UIView *portrait;
@property (nonatomic, retain) IBOutlet UIButton *landscapeFirstButton;
@property (nonatomic, retain) IBOutlet UIButton *portraitFirstButton;
@property (nonatomic, retain) IBOutlet UIButton *landscapeSecondButton;
@property (nonatomic, retain) IBOutlet UIButton *portraitSecondButton;
@property (nonatomic, retain) IBOutlet UIButton *landscapeThirdButton;
@property (nonatomic, retain) IBOutlet UIButton *portraitThirdButton;
-(IBAction)buttonPressed:(id)sender;
@end
Double-click SwapViewController.xib.
We are not going to use default view from the nib template.
So, we need to delete it.
Then, drag over two Views from the library, and rename them as in the picture.
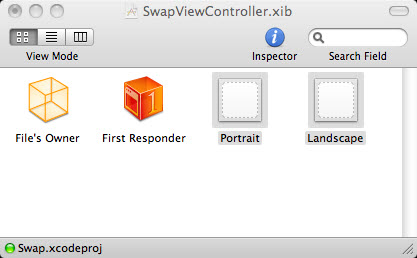
Control-drag from the File's Owner icon to the Portrait icon, select the portrait outlet at the gray popup menu. Next, do the same to Landscape icon. To set the launch time view which is Portrait, control-drag from File's Owner icon to Portrait and select the view outlet, indicating this view is the launch time view.
Let's make the views.
Bring up the size inspector for the Landscape view. Change the size from 320x460 to 480x300.
Two ways: (a)input those numbers or (b)press the little arrow icon in the right side of the title bar.
Bring over 3 Round Rect Buttons into the view.
Next, let's make connections.
Control-drag from the File's Owner icon to the First button, and assign it to the landscapeFirstButton outlet.
Do the same thing to other two more buttons.
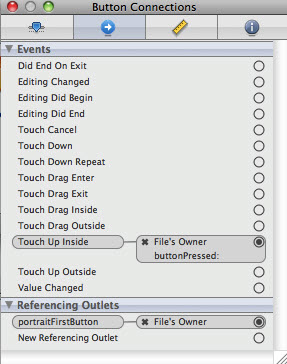
Select the First button, and switch to the connections inspector. Then drag from the Touch Up Inside event circle
to the File's Owner icon, and select buttonPressed: action method.
Same to the Portrait view.
Last task, implementation file "SwapViewController.m" is like this:
#import "SwapViewController.h"

@implementation SwapViewController
@synthesize landscape;
@synthesize portrait;
@synthesize landscapeFirstButton;
@synthesize portraitFirstButton;
@synthesize landscapeSecondButton;
@synthesize portraitSecondButton;
@synthesize landscapeThirdButton;
@synthesize portraitThirdButton;

-(IBAction)buttonPressed:(id)sender {

	if (sender == portraitFirstButton || sender == landscapeFirstButton) {
		portraitFirstButton.hidden = YES;
		landscapeFirstButton.hidden = YES;
	}
	else if (sender == portraitSecondButton || sender == landscapeSecondButton) {
		portraitSecondButton.hidden = YES;
		landscapeSecondButton.hidden = YES;
	}
	else {
		portraitThirdButton.hidden = YES;
		landscapeThirdButton.hidden = YES;
	}
}
- (void)willAnimateRotationToInterfaceOrientation:(UIInterfaceOrientation)
interfaceOrientation duration:(NSTimeInterval)duration {
    if (interfaceOrientation == UIInterfaceOrientationPortrait)
    {
        self.view = self.portrait;
        self.view.transform = CGAffineTransformIdentity;
        self.view.transform = CGAffineTransformMakeRotation(degreesToRadian(0));
        self.view.bounds = CGRectMake(0.0, 0.0, 300.0, 480.0);
    }
    else if (interfaceOrientation == UIInterfaceOrientationLandscapeLeft)
    {
        self.view = self.landscape;
        self.view.transform = CGAffineTransformIdentity;
        self.view.transform = CGAffineTransformMakeRotation(degreesToRadian(-90));
        self.view.bounds = CGRectMake(0.0, 0.0, 460.0, 320.0);
    }
    else if (interfaceOrientation == UIInterfaceOrientationPortraitUpsideDown)
    {
        self.view = self.portrait;
        self.view.transform = CGAffineTransformIdentity;
        self.view.transform = CGAffineTransformMakeRotation(degreesToRadian(180));
        self.view.bounds = CGRectMake(0.0, 0.0, 300.0, 480.0);
    }
    else if (interfaceOrientation == UIInterfaceOrientationLandscapeRight)
    {
        self.view = self.landscape;
        self.view.transform = CGAffineTransformIdentity;
        self.view.transform =
        CGAffineTransformMakeRotation(degreesToRadian(90));
        self.view.bounds = CGRectMake(0.0, 0.0, 460.0, 320.0);
    }
}
- (BOOL)shouldAutorotateToInterfaceOrientation:(UIInterfaceOrientation)interfaceOrientation {
	return YES;
}

- (void)didReceiveMemoryWarning {
	// Releases the view if it doesn't have a superview.
    [super didReceiveMemoryWarning];

	// Release any cached data, images, etc that aren't in use.
}

- (void)viewDidUnload {
	self.landscape = nil;
    self.portrait = nil;
    self.landscapeFirstButton = nil;
    self.landscapeSecondButton = nil;
	self.landscapeThirdButton = nil;
	self.portraitFirstButton = nil;
    self.portraitSecondButton = nil;
	self.portraitThirdButton = nil;
    [super viewDidUnload];
}
- (void)dealloc {
	[landscape release];
	[portrait release];
	[landscapeFirstButton release];
	[portraitFirstButton release];
	[landscapeSecondButton release];
	[portraitSecondButton release];
	[landscapeThirdButton release];
	[portraitThirdButton release];
	[super dealloc];
}

@end
Save nib. Build and Run.