BogoToBogo
  • Home
  • About
  • Big Data
  • Machine Learning
  • AngularJS
  • Python
  • C++
  • go
  • DevOps
  • Kubernetes
  • Algorithms
  • More...
    • Qt 5
    • Linux
    • FFmpeg
    • Matlab
    • Django 1.8
    • Ruby On Rails
    • HTML5 & CSS

The core - Image Load, Convert, and Save

OpenCV_Logo.png  height=


Bookmark and Share


bogotobogo.com site search:


Image - load, convert, and save

In this chapter, we'll learn how to load an image using imread().

Handling images is the basic building blocks of the OpenCV library and we should understand how to manipulate the images on a pixel level.

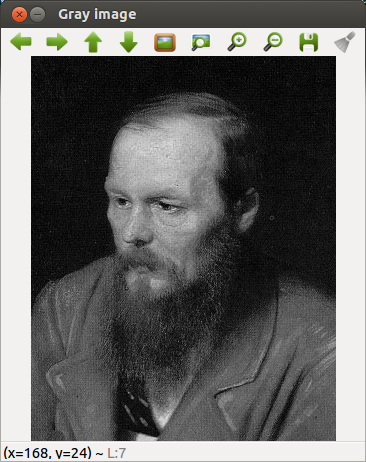
Also, we'll transform the loaded image to Greyscale format using cvtColor(). Then, we'll save the transformed image in a file using imwrite().

Actually, this is borrowed from opencv.org. However, depending on the platform or OpenCV version, it seems that we need to make some tweaks to make it work.

I am using OpenCV 3.0.0-dev from git and I am on Ubuntu 13.01 64 bit.

To me, since this tutorial is a Hello World for OpenCV, I cannot skip.

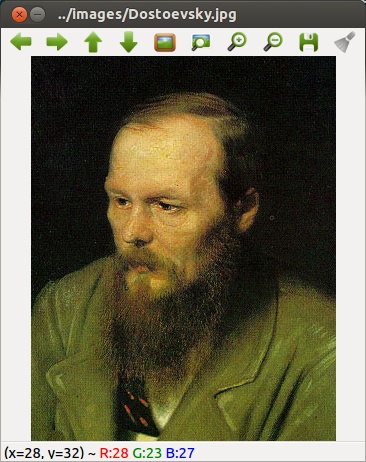
Below are the two pictures generated by the tutorial code:


Dostoevsk.png height=Dostoevsky_Gray.png height=


Code

Here is our code, imgLoad.cpp:

#include <opencv2/opencv.hpp>
#include <opencv2/highgui/highgui_c.h>

using namespace cv;

int main( int argc, char** argv )
{
    // argv[1] - whaere the image is located
    char* imagePath = argv[1];

    // create a MAT object for input image
    Mat image;

    // load an image
    image = imread( imagePath, 1 );

    if( argc != 2 || !image.data )
    {
        printf( " No image data \n " );
        return -1;
    }

    // create a MAT object for gray image
    Mat gray_image;

    // convert to Greyscale format
    // cvtColor( image, gray_image, CV_BGR2GRAY );
    cvtColor( image, gray_image, COLOR_BGR2GRAY );

    // save the transformed image to a file
    imwrite( "../images/GrayImage.jpg", gray_image );

    // creates two windows
    namedWindow( imagePath, CV_WINDOW_AUTOSIZE );
    namedWindow( "Gray image", CV_WINDOW_AUTOSIZE );

    // imshow() displays an image in the specified window. 
    // If the window was created with the CV_WINDOW_AUTOSIZE flag, 
    // the image is shown with its original size
    imshow( imagePath, image );
    imshow( "Gray image", gray_image );

    // wait for key press
    waitKey(0);

    return 0;
}

and with the cmake file, :

cmake_minimum_required(VERSION 2.8)
project( ImageLoads )
find_package( OpenCV REQUIRED )
add_executable( ImageLoads imgLoad.cpp )
target_link_libraries( ImageLoads ${OpenCV_LIBS} )

So, put the two files in a directory called ImageLoads and run cmake:

$ cmake .
-- Configuring done
-- Generating done
-- Build files have been written to: /home/khong/OpenCV/workspace/Tutorials/ImageLoads
$ make
Scanning dependencies of target ImageLoads
[100%] Building CXX object CMakeFiles/ImageLoads.dir/imgLoad.cpp.o
Linking CXX executable ImageLoads
[100%] Built target ImageLoads

If we run the code, it will create two windows each of them has a picture as shown above.

$  ./ImageLoads ../images/Dostoevsky.jpg

The input image is available Dostoevsky.jpg.


Notes on the Code
  1. Initially, I got an error: "CV_WINDOW_AUTOSIZE was not declared in this scope."
    It turned out I need "#include <opencv2/highgui/highgui_c.h>
  2. I also got a similar error for 'CV_BGR2GRAY'
    That was because of I'm using OpenCV 3.0.0 from git.
    So, I modified it to 'COLOR_BGR2GRAY' which is defined in 'opencv2/imgproc.hpp'
  3. The cvtColor() takes as arguments:
    1. a source image (image)
    2. a destination image (gray_image), in which we will save the converted image.
    3. an additional parameter that indicates what kind of transformation will be performed. In this case we use COLOR_BGR2GRAY (because of imread has BGR default channel order in case of color images).


Ph.D. / Golden Gate Ave, San Francisco / Seoul National Univ / Carnegie Mellon / UC Berkeley / DevOps / Deep Learning / Visualization

YouTubeMy YouTube channel

Sponsor Open Source development activities and free contents for everyone.

Thank you.

- K Hong


OpenCV 3 -

image & video processing


Installing on Ubuntu 13

Mat(rix) object (Image Container)

Creating Mat objects

The core : Image - load, convert, and save

Smoothing Filters A - Average, Gaussian

Smoothing Filters B - Median, Bilateral


Sponsor Open Source development activities and free contents for everyone.

Thank you.

- K Hong


OpenCV 3 image and video processing with Python


OpenCV 3 with Python

Image - OpenCV BGR : Matplotlib RGB

Basic image operations - pixel access

iPython - Signal Processing with NumPy

Signal Processing with NumPy I - FFT and DFT for sine, square waves, unitpulse, and random signal

Signal Processing with NumPy II - Image Fourier Transform : FFT & DFT

Inverse Fourier Transform of an Image with low pass filter: cv2.idft()

Image Histogram

Video Capture and Switching colorspaces - RGB / HSV

Adaptive Thresholding - Otsu's clustering-based image thresholding

Edge Detection - Sobel and Laplacian Kernels

Canny Edge Detection

Hough Transform - Circles

Watershed Algorithm : Marker-based Segmentation I

Watershed Algorithm : Marker-based Segmentation II

Image noise reduction : Non-local Means denoising algorithm

Image object detection : Face detection using Haar Cascade Classifiers

Image segmentation - Foreground extraction Grabcut algorithm based on graph cuts

Image Reconstruction - Inpainting (Interpolation) - Fast Marching Methods

Video : Mean shift object tracking

Machine Learning : Clustering - K-Means clustering I

Machine Learning : Clustering - K-Means clustering II

Machine Learning : Classification - k-nearest neighbors (k-NN) algorithm


Matlab Image and Video Processing


Vectors and Matrices

m-Files (Scripts)

For loop

Indexing and masking

Vectors and arrays with audio files

Manipulating Audio I

Manipulating Audio II

Introduction to FFT & DFT

Discrete Fourier Transform (DFT)


Digital Image Processing 2 - RGB image & indexed image

Digital Image Processing 3 - Grayscale image I

Digital Image Processing 4 - Grayscale image II (image data type and bit-plane)

Digital Image Processing 5 - Histogram equalization

Digital Image Processing 6 - Image Filter (Low pass filters)

Video Processing 1 - Object detection (tagging cars) by thresholding color

Video Processing 2 - Face Detection and CAMShift Tracking


Contact

BogoToBogo
contactus@bogotobogo.com

Follow Bogotobogo

About Us

contactus@bogotobogo.com

YouTubeMy YouTube channel
Pacific Ave, San Francisco, CA 94115

Pacific Ave, San Francisco, CA 94115

Copyright © 2024, bogotobogo
Design: Web Master